Create a Minimal Agent Pipeline
Start simple by creating a minimal Agent pipeline that passes the query to the Agent and returns the result.
About This Task
Create a minimal Agent pipeline to understand how to connect the Agent to other components and build more complex systems. In this pipeline, the Agent receives the user query and generates a response.
Create an Agent Pipeline
-
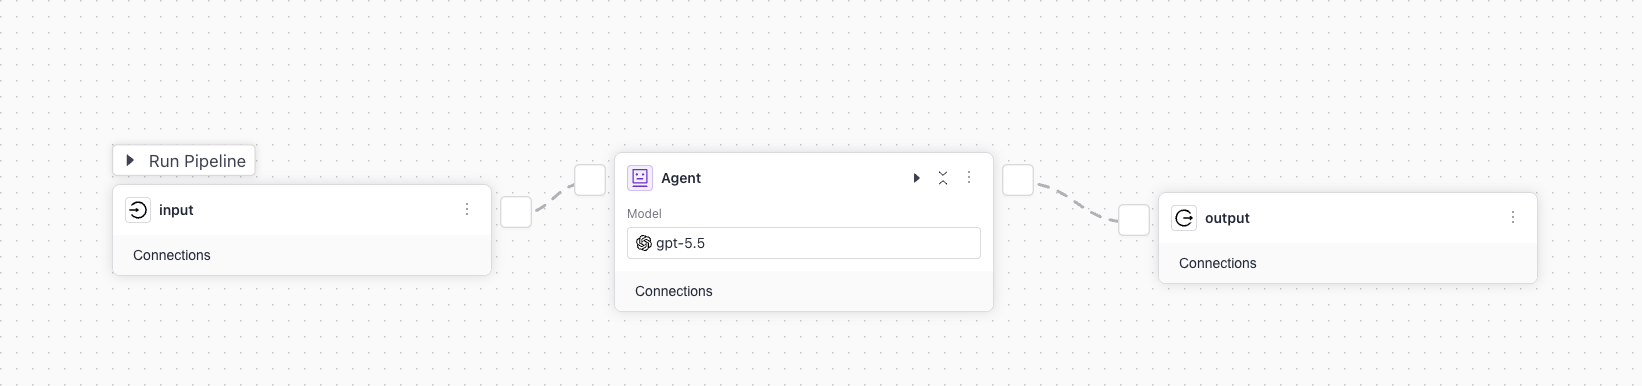
In the left navigation, go to Pipelines Templates>Create empty pipeline.
-
Give your pipeline a name and click Create Pipeline.
-
Click Add to open the component library, find
Inputand drag it onto the canvas. -
Now, drag the
Agentcomponent onto the canvas. -
Connect
InputtoAgent. The Builder automatically connectsInput'smessagesoutput toAgent'smessagesinput. -
On the Agent component card, click Prompt, and enter the following prompt in the System prompt field:
You are a helpful assistant.
Answer the user's question.
Agent OutputThe Agent component has no output connections until you configure its prompt. Once you enter the prompt, you'll see
messagesas an output connection. -
Click Add, find
Output, and drag it onto the canvas. Every query pipeline must end with theOutputcomponent. -
Connect
AgenttoOutput. The Builder automatically connectsAgent'smessagesoutput toOutput'smessagesinput. -
Save the pipeline.
This is how the pipeline should look like:
This is the pipeline YAML:
components:
  Agent:
    type: haystack.components.agents.agent.Agent
    init_parameters:
      chat_generator:
        init_parameters:
          model: gpt-5.4
        type: haystack.components.generators.chat.openai_responses.OpenAIResponsesChatGenerator
      tools:
      system_prompt: |-
        {% message role="system" %}
        You are a helpful assistant. Answer user's question.
        {% endmessage %}
      user_prompt:
      required_variables:
      exit_conditions:
      state_schema: {}
      max_agent_steps: 100
      streaming_callback:
      raise_on_tool_invocation_failure: false
      tool_invoker_kwargs:
      confirmation_strategies:

connections: []

max_runs_per_component: 100

metadata: {}

inputs:
  messages:
  - Agent.messages

outputs:
  messages: Agent.messages
Run the Pipeline
- In Builder, click Run Pipeline.
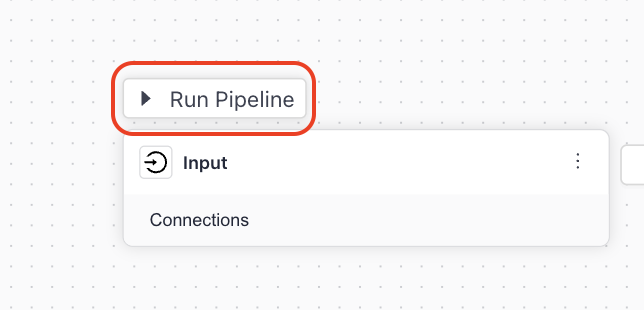
- Ask any question and see how the Agent responds.
What To Do Next
- Configure the Agent's model, prompt, and tools. Once you do that, you'll already have a powerful Agent with tools it can use to expand its capabilities.
- If needed, configure the Agent's advanced settings, such as when it should stop, what to store in the Agent's state, and more.
- Check out our Agent templates available in Haystack Platform on the Pipeline Templates page.
Tutorials
Follow these step-by-step tutorials to see a complete agent built with tools:
- Building a Deal Desk Agent with Search and Custom Code — Combines a document search pipeline tool with a custom code tool.
- Building an IT Helpdesk Agent with Multiple Knowledge Bases — Uses two document search pipeline tools to route between knowledge bases.
Was this page helpful?