Create an Index
Define the processing steps for your files to prepare them for search. You use Builder to create your indexes.
About This Task
You create indexes just like you create pipelines. Indexes are a series of connected components, each performing a preprocessing step on your files. To learn more, see Indexes.
Indexes are specific to a workspace. A single query pipeline can use multiple indexes.
You can use Builder to design your indexes.
Using Builder
About Builder
Builder is an easy way to build and visualize your index. In Builder, you simply drag components from the components library and drop them onto a canvas, where you can customize their parameters and define connections. It helps you visualize your index and offers guidance on component compatibility. You can also switch to the YAML view anytime; everything you do in Builder is synchronized with the pipeline YAML configuration.
Using Builder
This image shows how to access the basic functionalities in Builder. The numbers in the list below correspond to the numbers in the image.
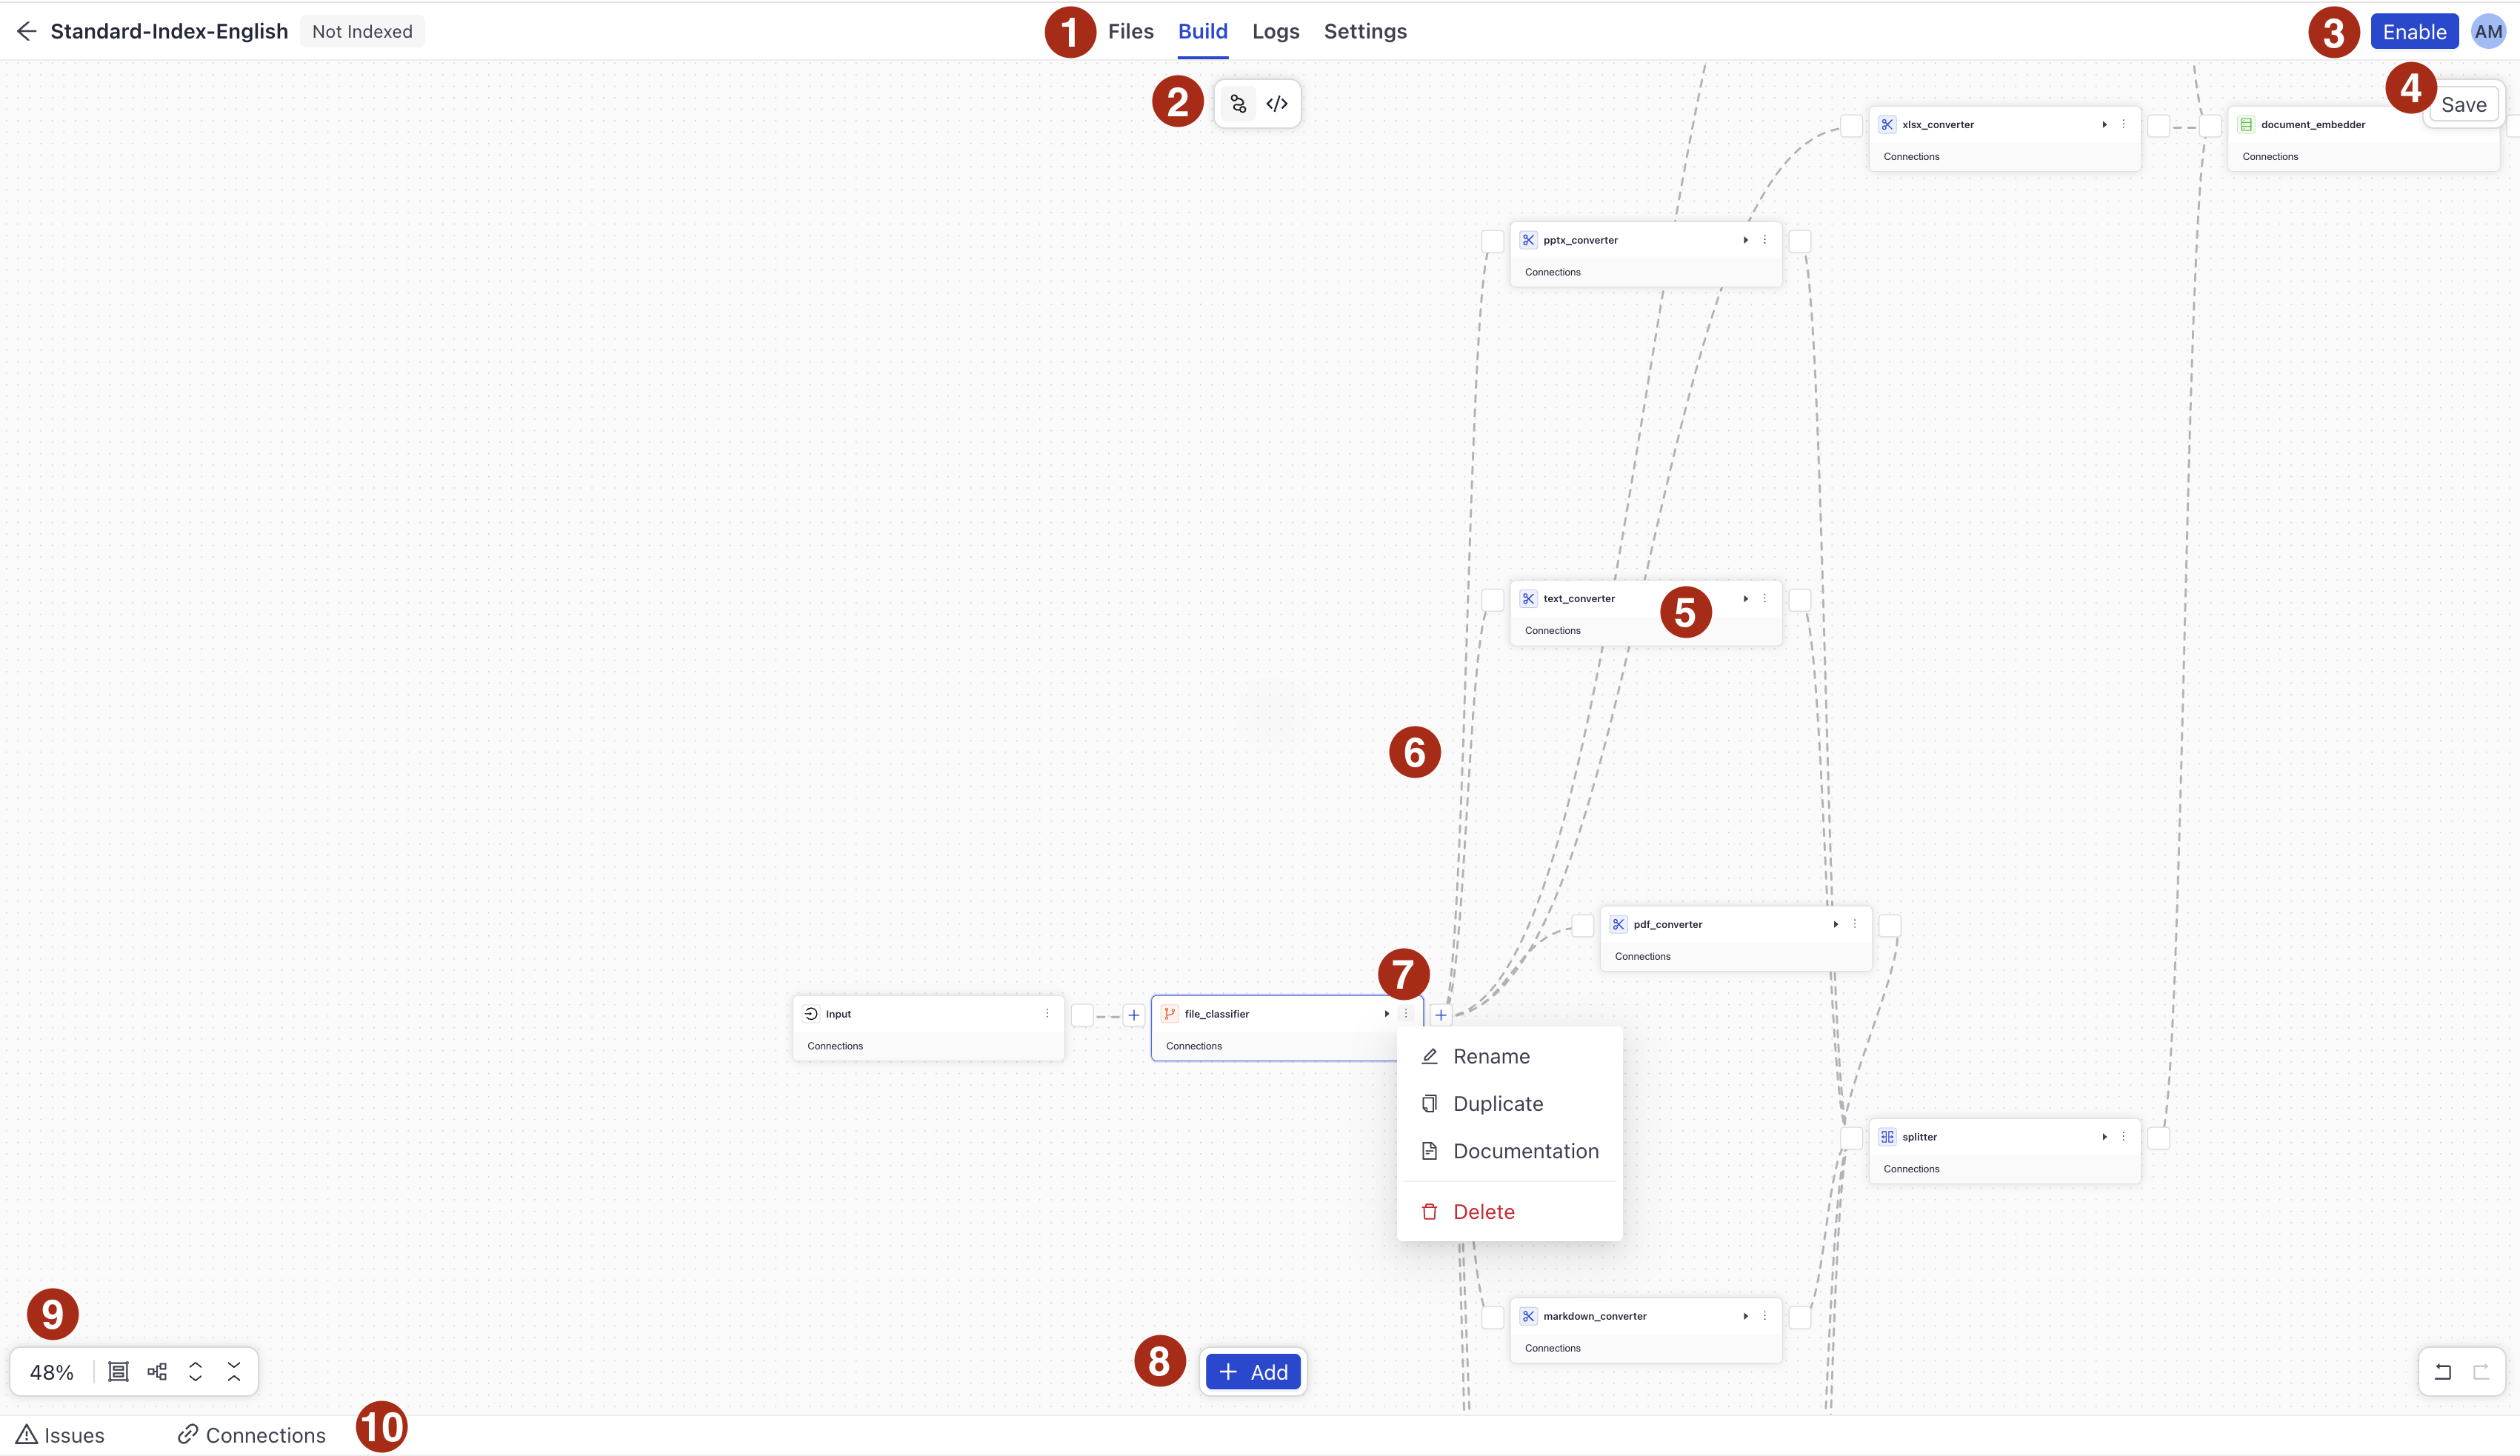
- Switch between Files, Build (where you can design your index), logs, and settings (where you can check the index ID, enable GPU, or file filtering).
- Switch between YAML editor and visual canvas.
- Enable the index to start indexing files.
- Save your index.
- A component card. Click the component to open its configuration. Hover over the component icon to check its type and location.
- Component connections. Drag a line between components to connect them or use the Connections panel. You can also use the Command Palette to create connections. Press CMD + K to open it and type
connectto see the available commands. - Run and More Actions. Click the Run button to run the component in isolation and the More Actions button to access the component's menu.
- Add components. Click Add to open the component library and drag a selected component onto the canvas to add it to your index. You can also use the search bar to find components. The search bar includes an AI-powered semantic search, so you can search for components by their name or functionality. By default, the component library hides legacy components. To show them, click More Actions next to the search field and choose Show deprecated components. You can also pin the component library to keep it always visible.
- Use this menu to:
- Zoom in and out of the canvas.
- Group components. You can collapse and expand groups to reduce visual clutter. Groups are saved with your pipeline and restored when you reload the builder.
- Return to the default positioning of components.
- Expand or collapse components.
- Issues and Connections. Expand the view to see all validation and runtime issues in one place. Click Inspect next to an issue to jump directly to the affected component or connection and fix it. Click Fix with AI to open the AI assistant, which reasons through the fix and can apply it for you. Expand the Connections view to manage, inspect, and edit component connections.
Running Components
You can run single components to understand their inputs and outputs and check if they work correctly before you save and deploy the whole index. Click Run on a component card.
After you save an index, you must enable it to start indexing the files in your workspace. Files uploaded after an index was enabled, are automatically added to the enabled index. The query pipeline can access all files only after indexing is complete.
Prerequisites
- Understanding indexes. To learn more, see Indexes.
- Understanding pipelines and components. For details, see Pipelines and Pipeline Components.
Create an Index in Pipeline Builder
-
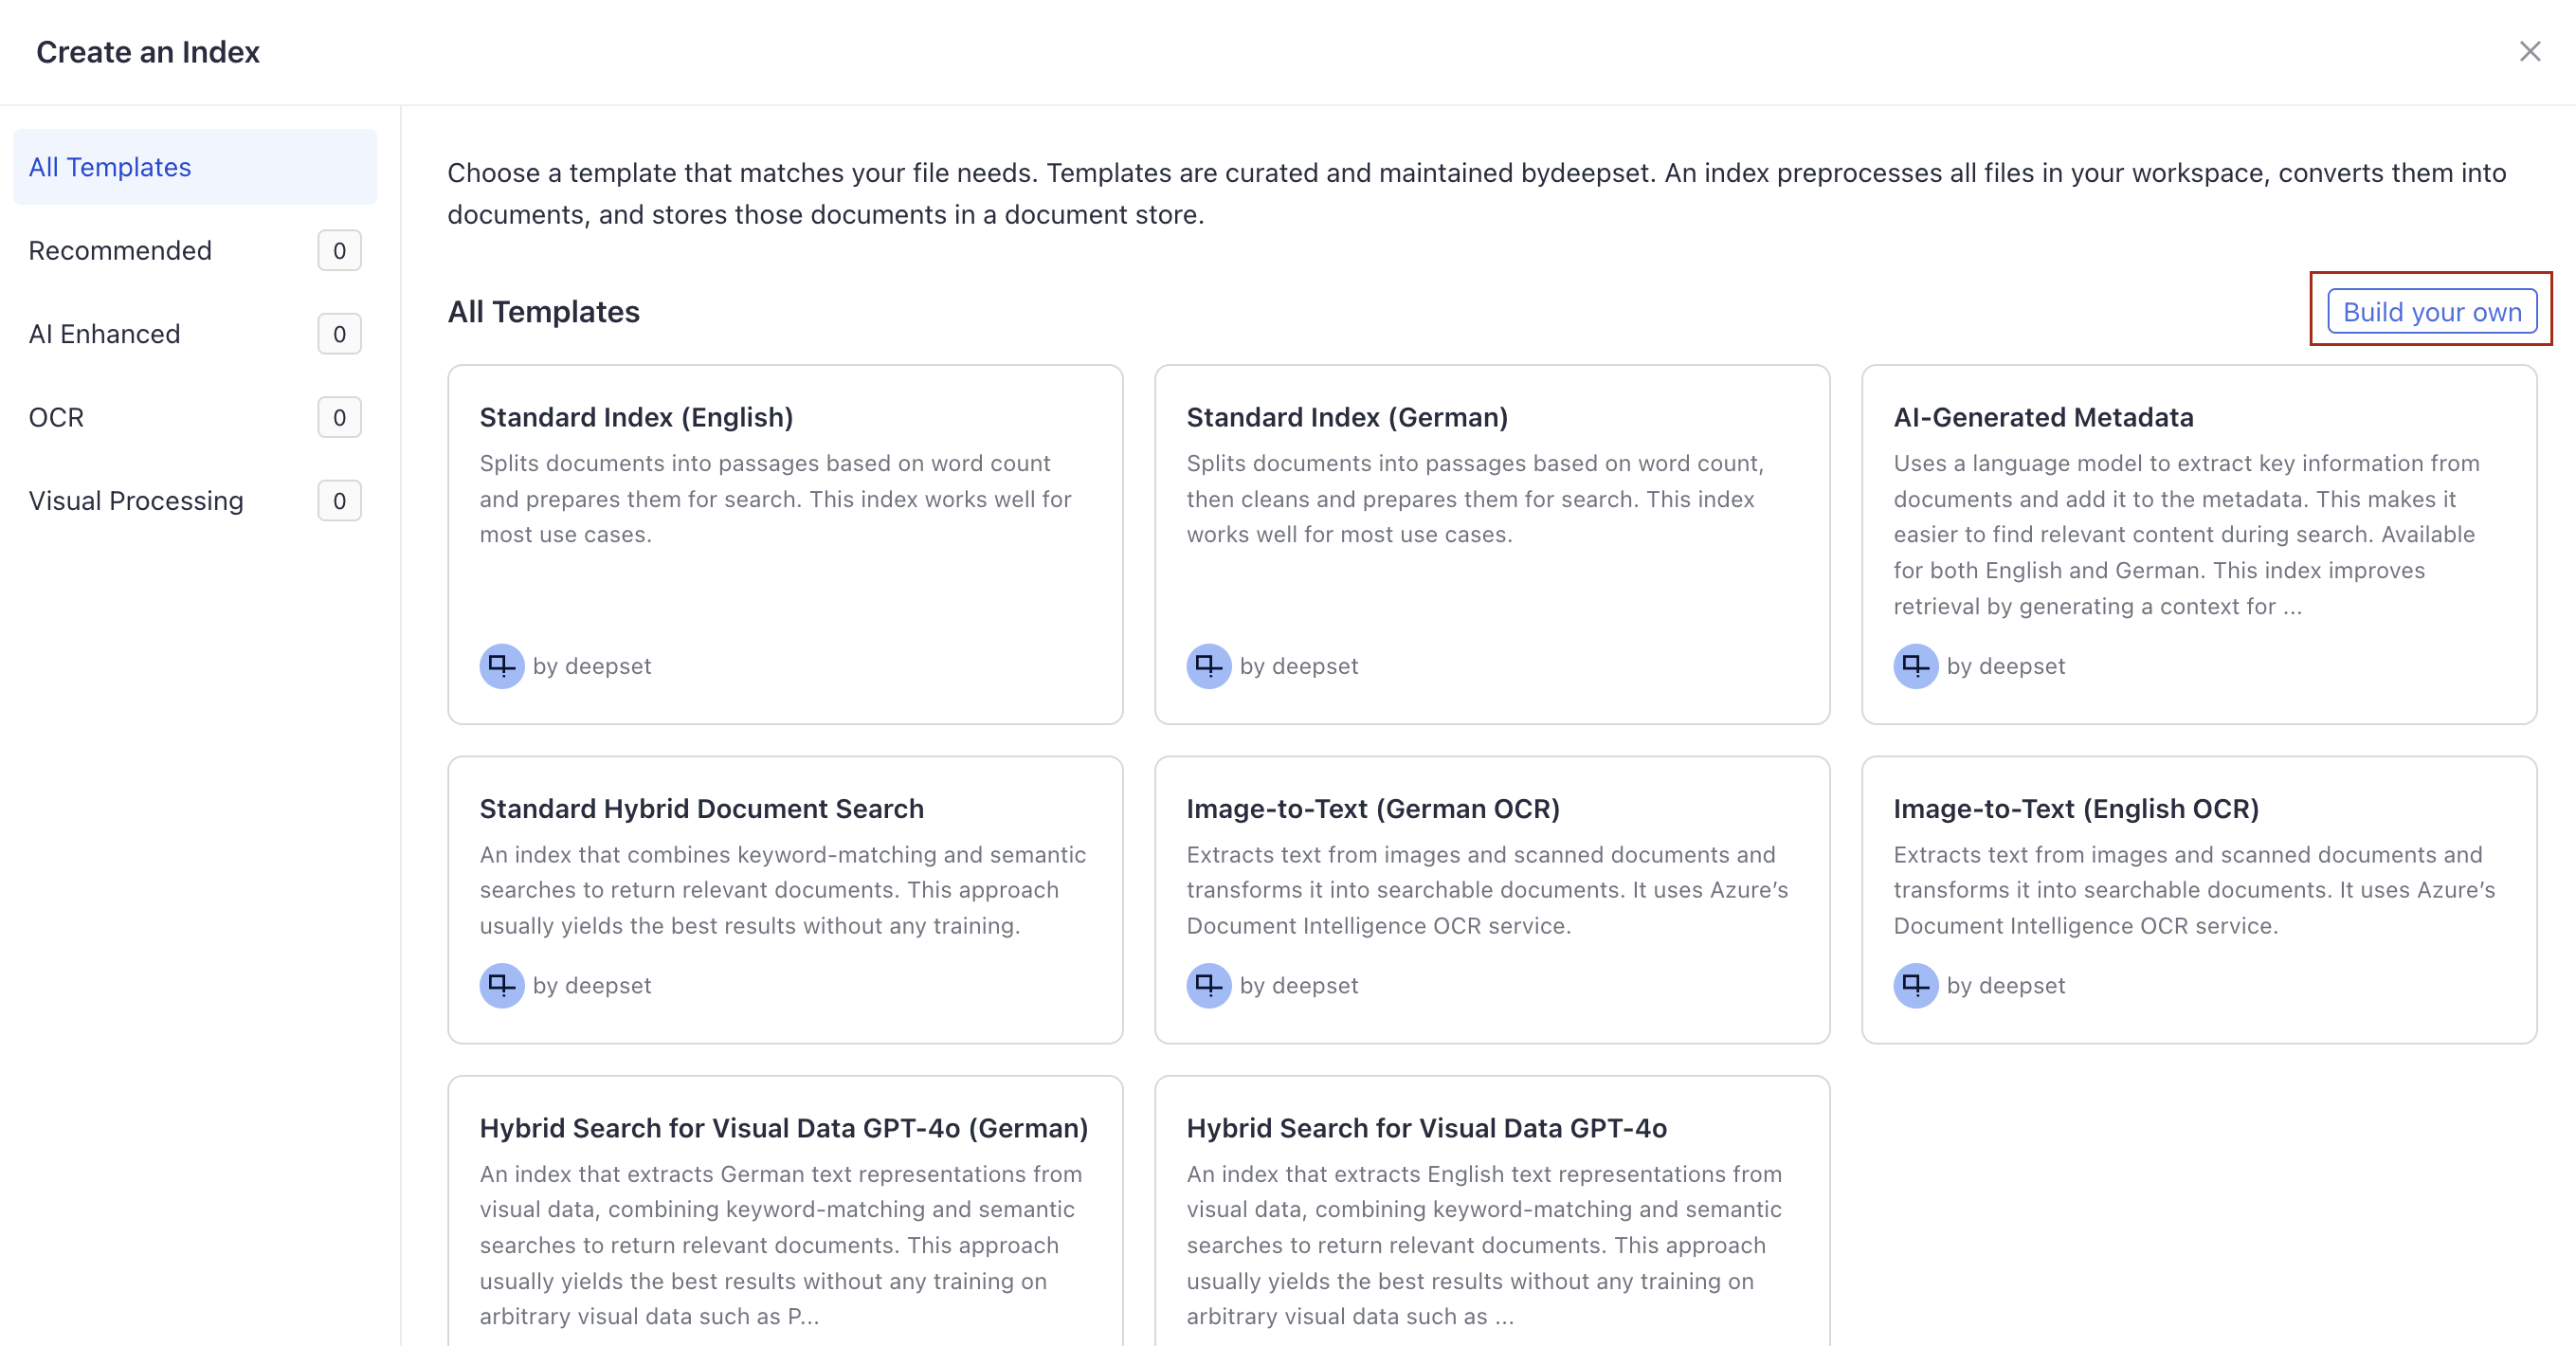
Log in to Haystack Enterprise Platform, go to Indexes and choose Create Index.
-
Choose a template to start with or click Build your own to create an index from scratch.
-
Give your index a name and add a meaningful description.
-
Click Create index. You're redirected to Builder.
-
If you're creating the index from a template, edit the template if needed and save your index.
-
If you're creating an index from an empty file, click Add to see available components, and:
- Drag the
Inputcomponent onto the canvas. This is always the first component of an index. It represents the files your index will process. - The second component is often
FileTypeRouter. It's useful if you're planning to index files of different types. You can set it to identify the file type and route it to an appropriate converter. - Choose
Convertersfor the file types you want to index. You can either search for them or view all converters in Data Processing > Convert. - Add
Preprocessorsas needed. You can either search for them or view all preprocessors in Data Processing > Clean & Split. - Connect the components by clicking one component's input and then another component's output. The connection is automatically created and validated.
Tip: Open the Connections panel at the bottom of the canvas to manage, inspect, and edit component connections. - Add
DocumentWriteras the last component of your index. It writes the processed documents into the document store where a query pipeline can access it. - Add a
DocumentStorethat will use this index and connect it toDocumentWriter.
Tip:OpenSearchDocumentStoreis the core document store. - Save your index.
- Drag the
What To Do Next
- Enable the index to start indexing files. Click Enable on the index page.
- Add the index to your query pipelines. For details, see Edit a Pipeline or Create a Pipeline in Pipeline Builder.
- Click the index name to open the Index Details page where you can see the index information, logs, and processed files.
Was this page helpful?