Tutorial: Automatically Tagging Your Data with an LLM
Create an index that uses a large language model to tag your data and add the tags to metadata. Labelling data with an LLM provides a fast, consistent, and scalable way of adding metadata to your files.
- Level: Beginner
- Time to complete: 20 minutes
- Prerequisites:
- A basic understanding of how indexes work. To learn more, see Indexes.
- A Haystack Platform workspace where you'll upload the data and create the index. For instructions on how to create a workspace, see Quick Start Guide.
- An API key for the Haystack Platform workspace. For information how to generate it, see Generate API Keys.
- Goal: After completing this tutorial, you'll have created an index that uses an LLM to tag your data. The tags the LLM generates will be stored in each file's metadata so you can use them in your search app. You'll use an example dataset of emails to do this.
Upload Data
First, let's upload the data to the Haystack Platform workspace where we'll then create the auto-labelling index.
- Download the sample emails dataset and unpack it on your computer. This is a collection of emails you'll tag. you can also use your own files.
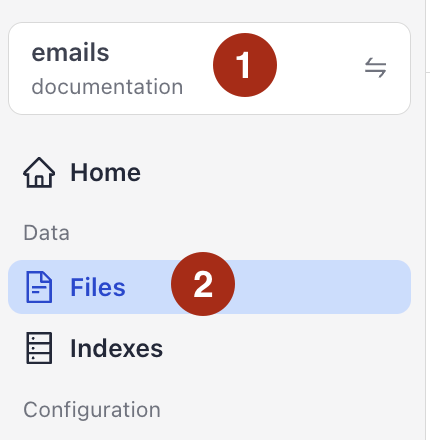
- Log in to Haystack Enterprise Platform, make sure you're in the right workspace, and go to Files.
- Click Upload Files, drag the files you unpacked in step 1 and drop them in the Upload Files window. (You must select all files in the folder, Haystack Platform doesn't support uploading folders.)
- Click Upload and wait until the files are in the workspace.
Result: Your files are in the Haystack Platform workspace and you can see them on the Files page.
Create an Index
Once your data is in Haystack Platform, you can create an index that will be the starting point for the auto-labelling system. The index prepares files for search and writes them into a document store, where a query pipeline can access them.
- Go to Indexes and click Create Index. This opens available index templates.
- Click the AI-Generated Metadata for Files index to use it.
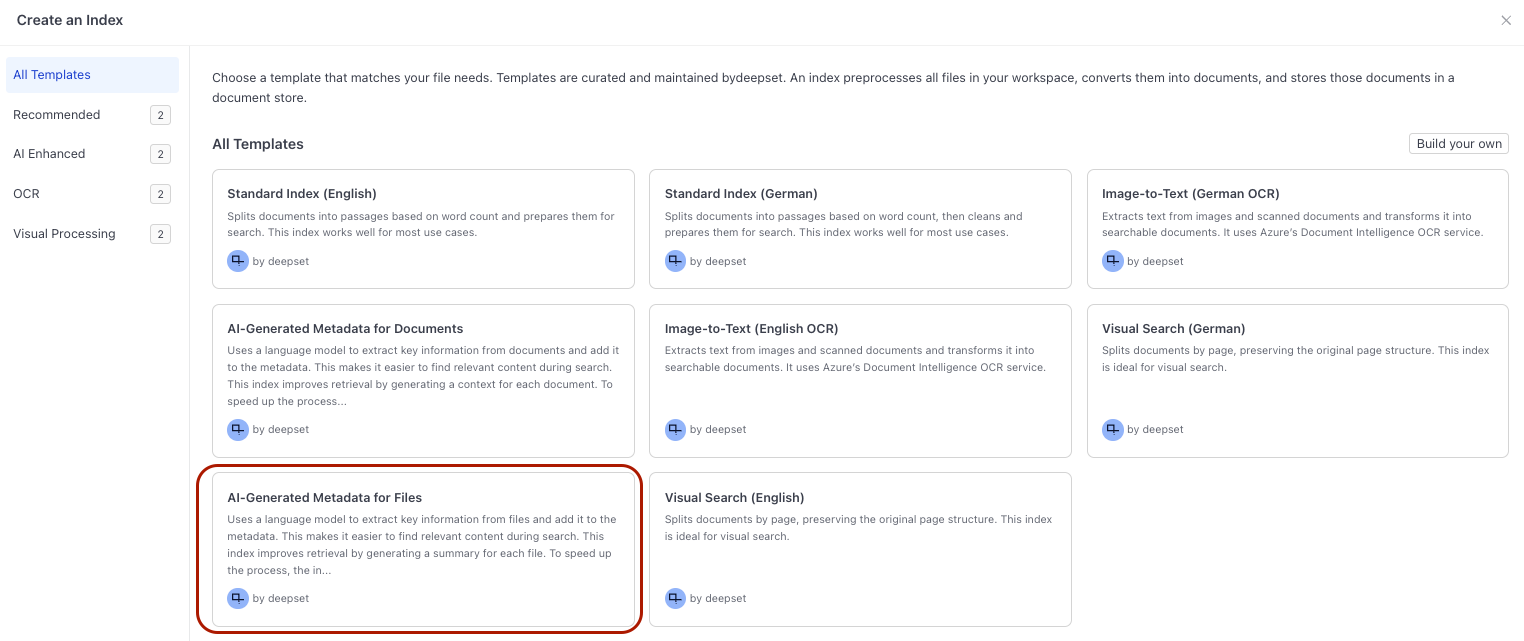
- Leave the default index name and click Create Index. You land in Builder with the index open for editing..
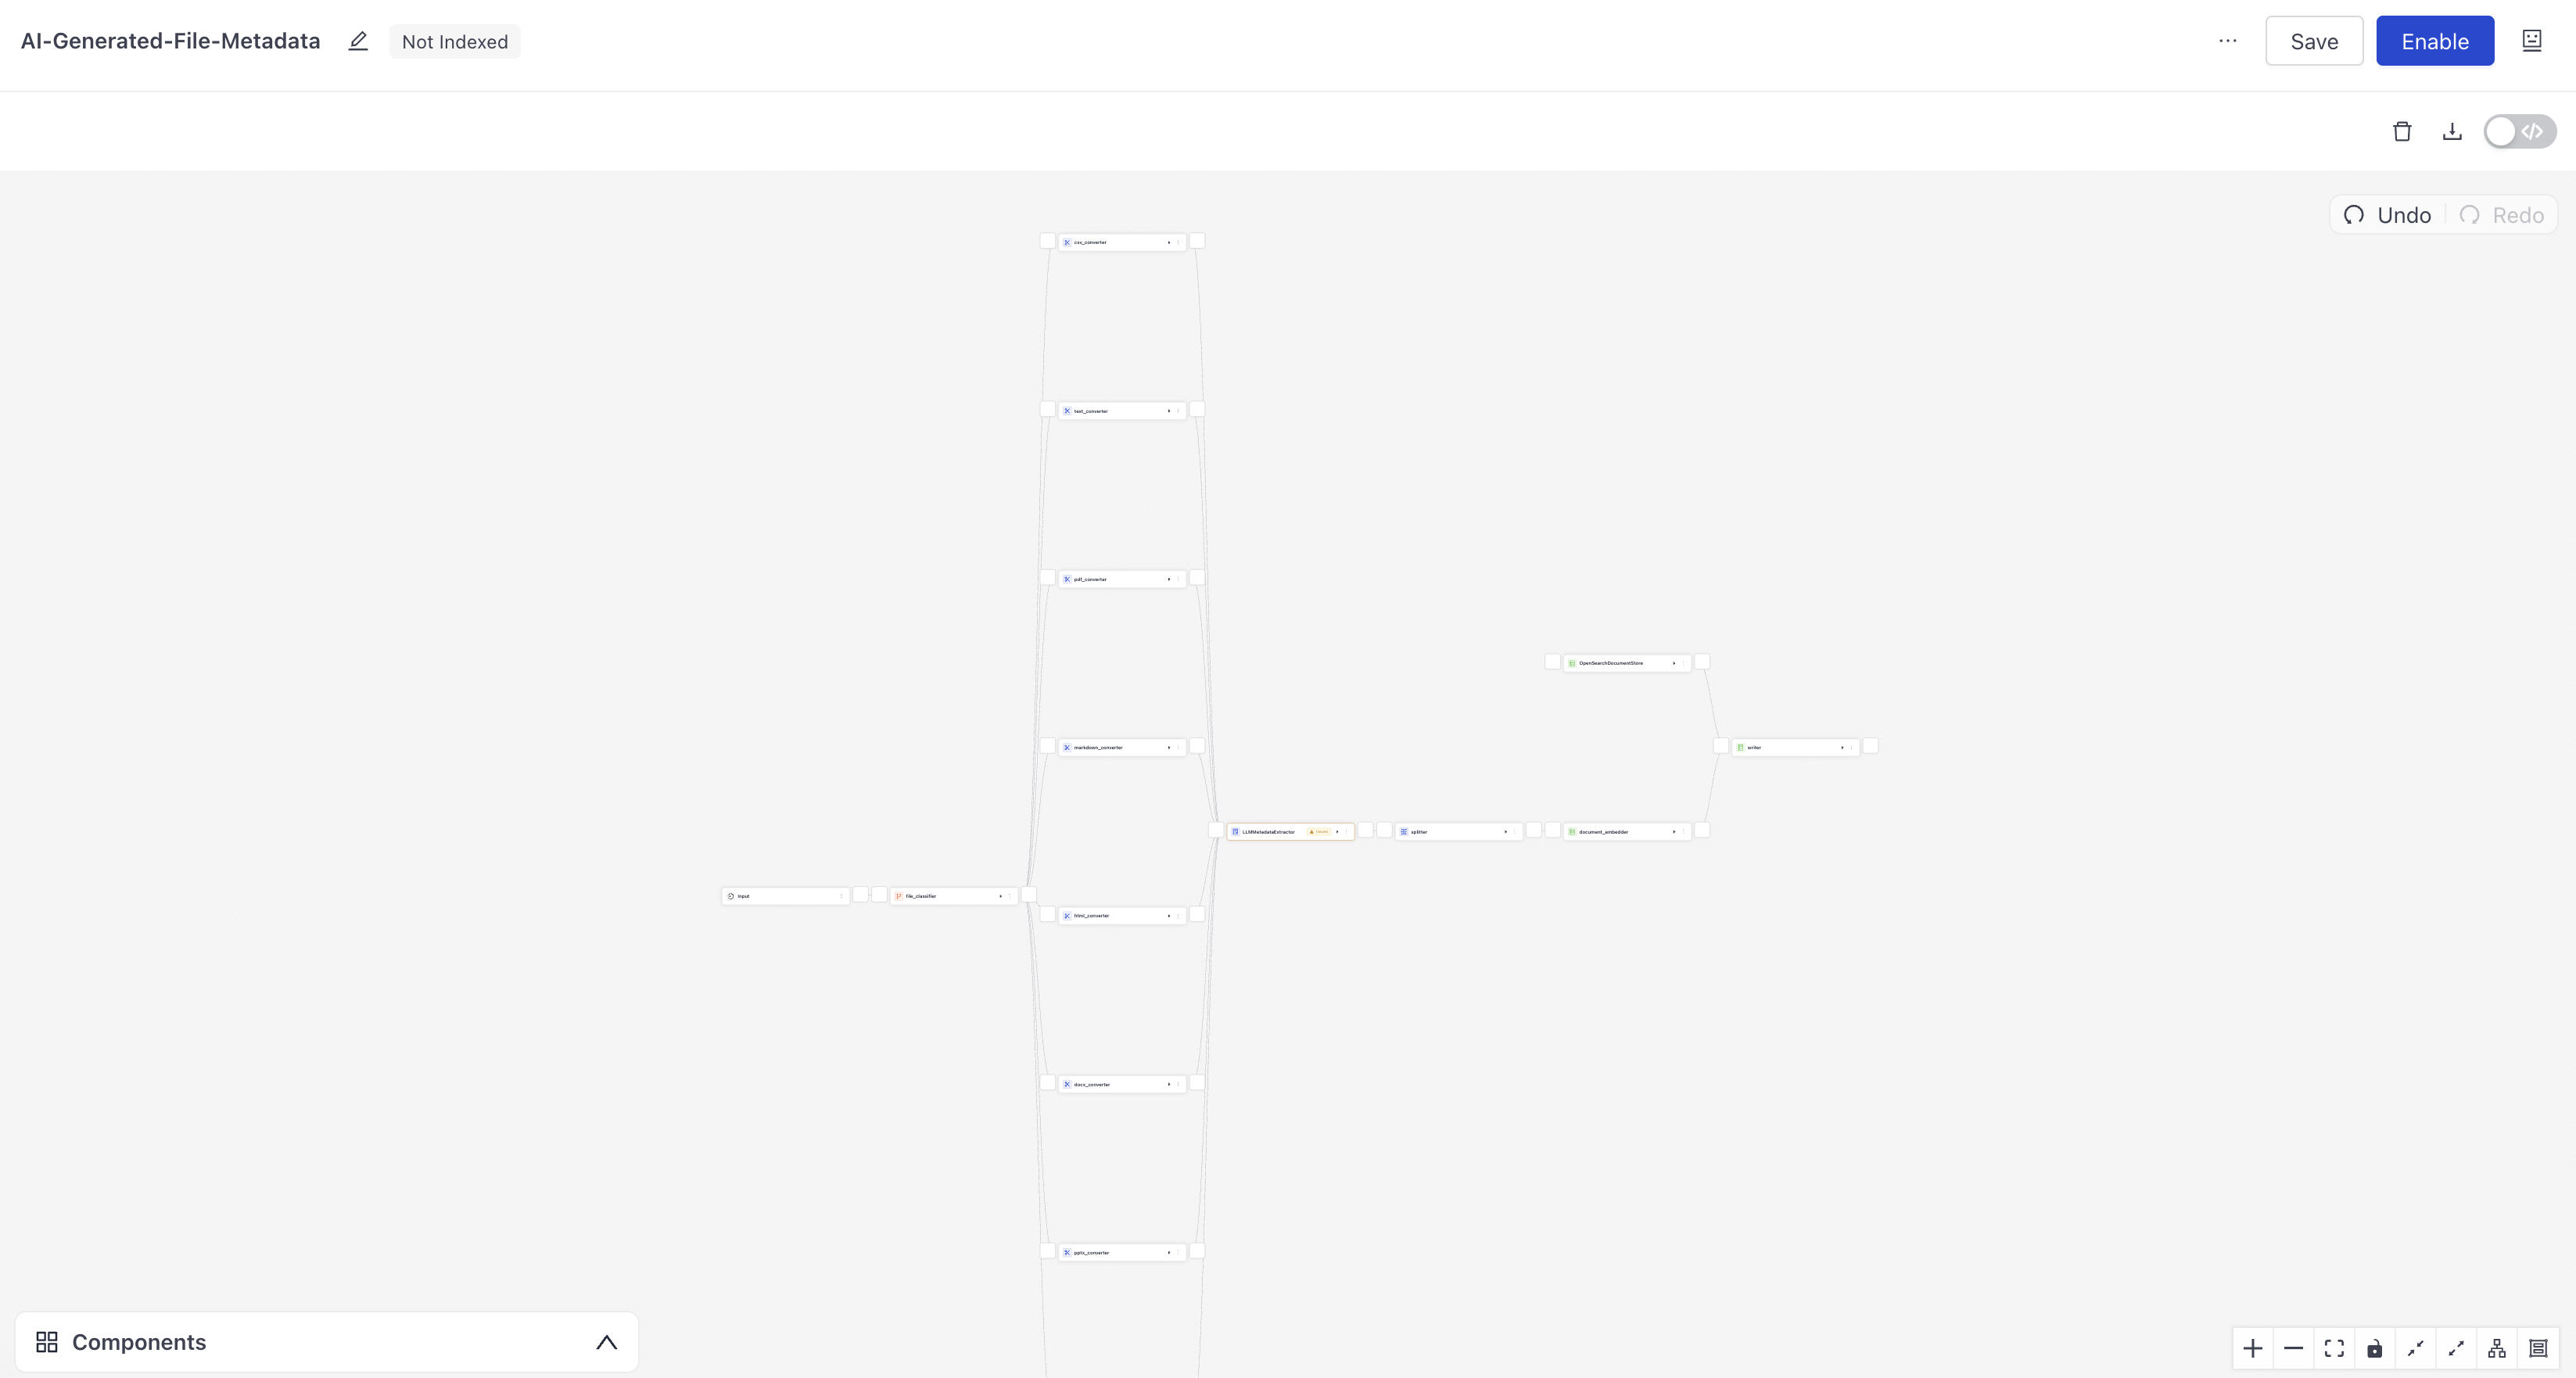
Result: You created an index that can preprocess multiple file types and extract title and summary from the files.
Adjust the Index
This index uses an LLM to extract the file title and generate a file summary that it then adds to each file's metadata. It's also designed to preprocess multiple file types, while we only need to preprocess text files. Let's simplify preprocessing and update the prompt to tag the emails with:
- Urgency
- Type
- Action required
Simplify preprocessing
Note: This step is optional, but it gets rid of components you don't need and makes the index simpler. You can also leave the index as is, it will work correctly too, using only the converters it needs to preprocess the files.
The emails from the dataset are text files, so you only need a text file converter. Let's remove all the other converters.
-
Zoom in using the zoom-in icon (+) at the bottom of the page.
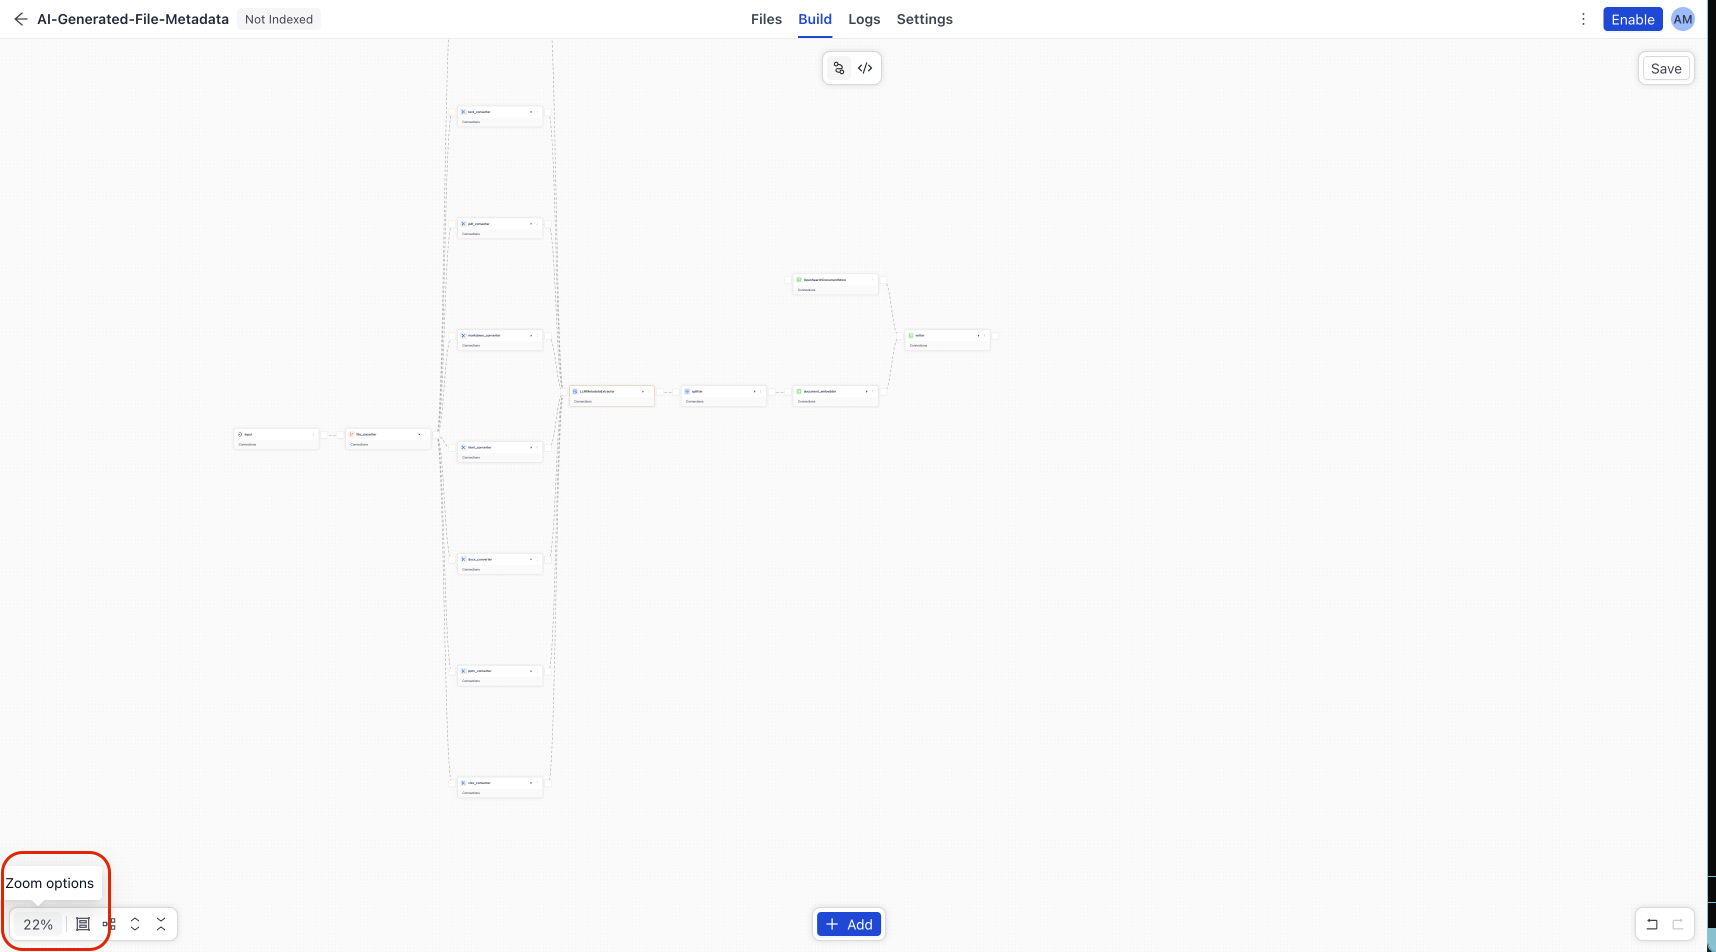
-
Scroll up, find
csv_converter, and click More Actions on the component. You'll see all available actions for this component.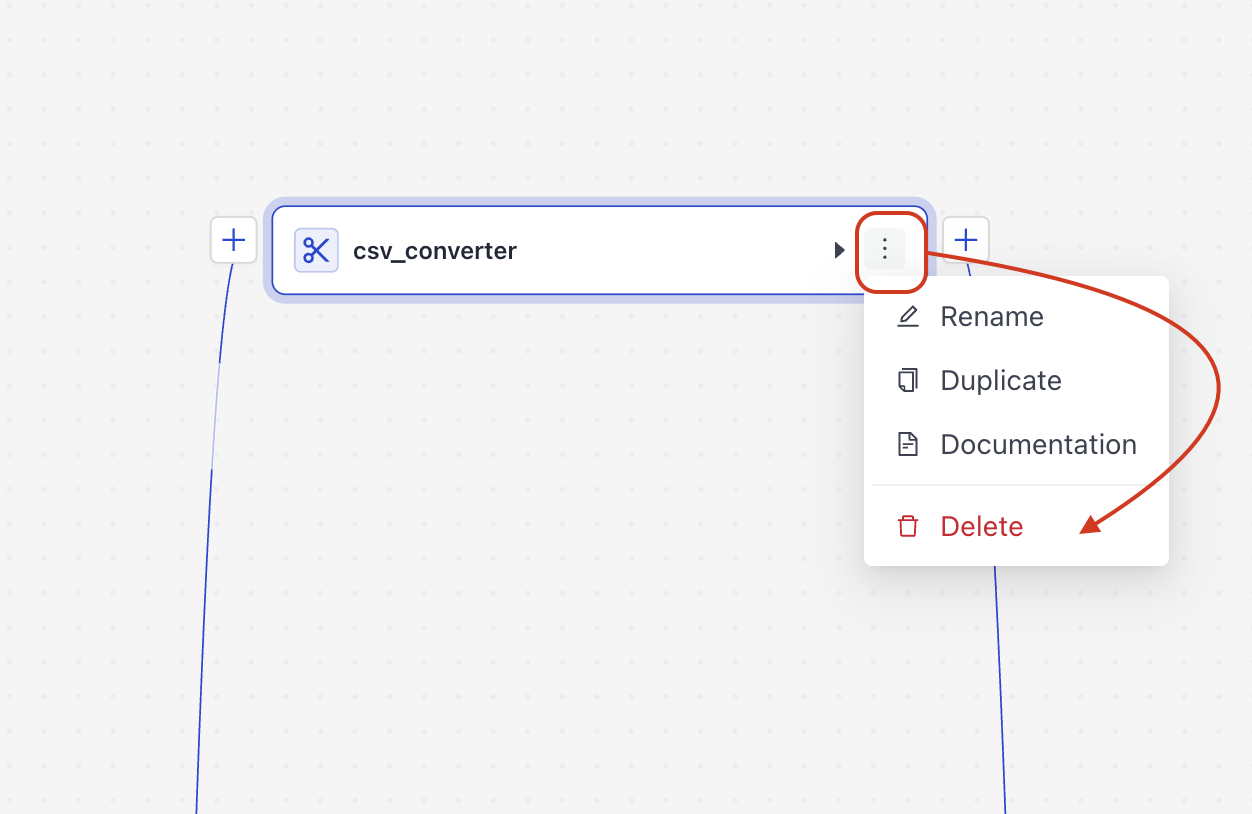
-
Click Delete .
-
Repeat steps 2 and 3 for the following components:
pdf_convertermarkdown_converterhtml_converterdocx_converterpptx_converterxlsx_converter
You should only have thetext_converterleft, connected tofile_classifierandLLMMetadataExtractor: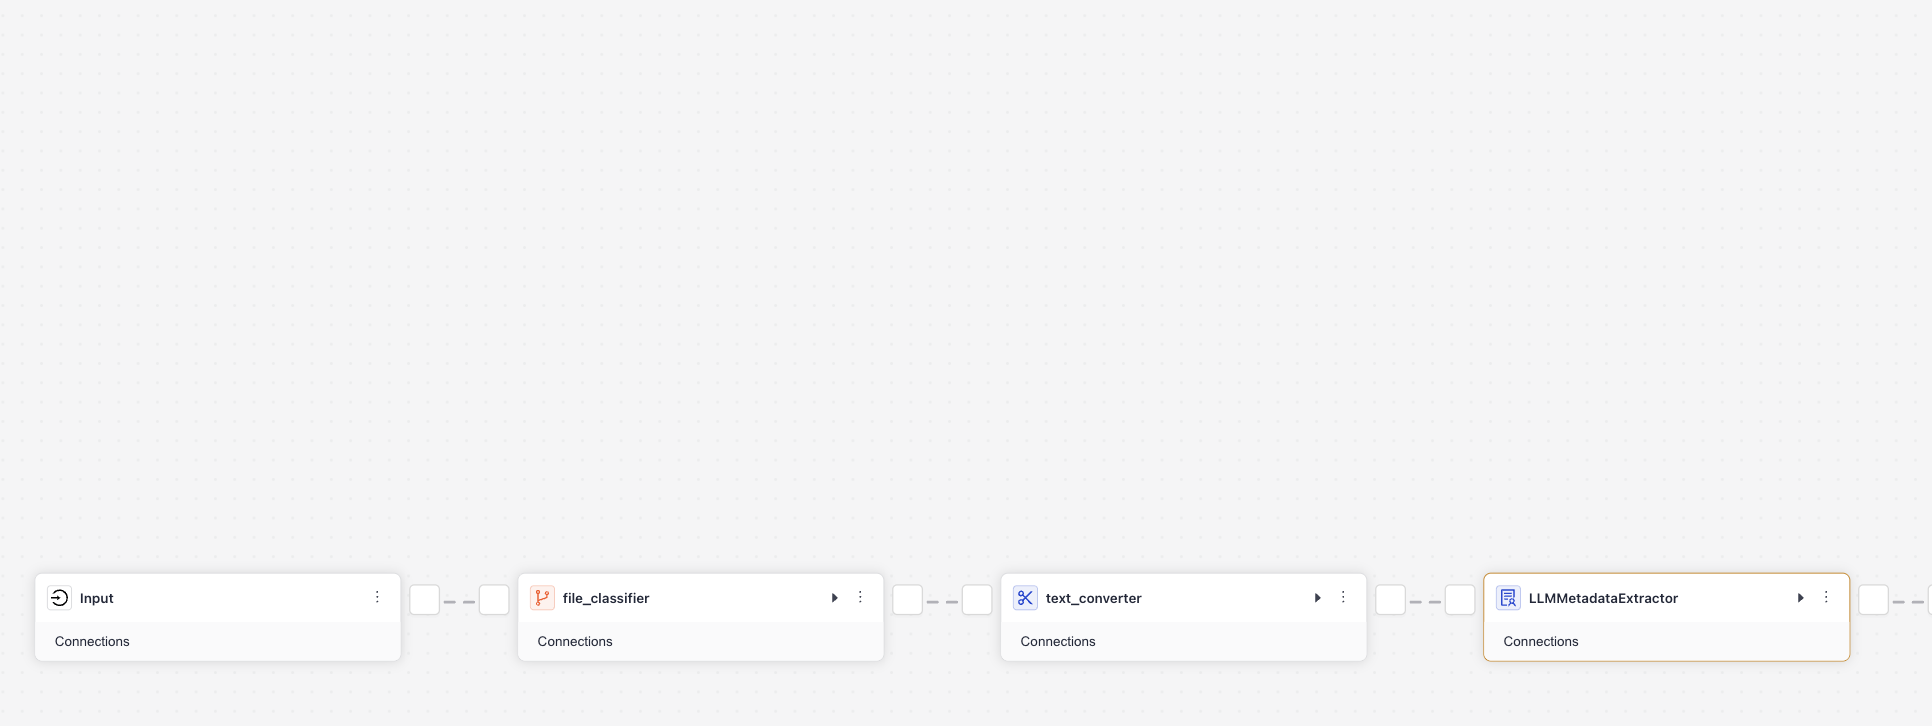
-
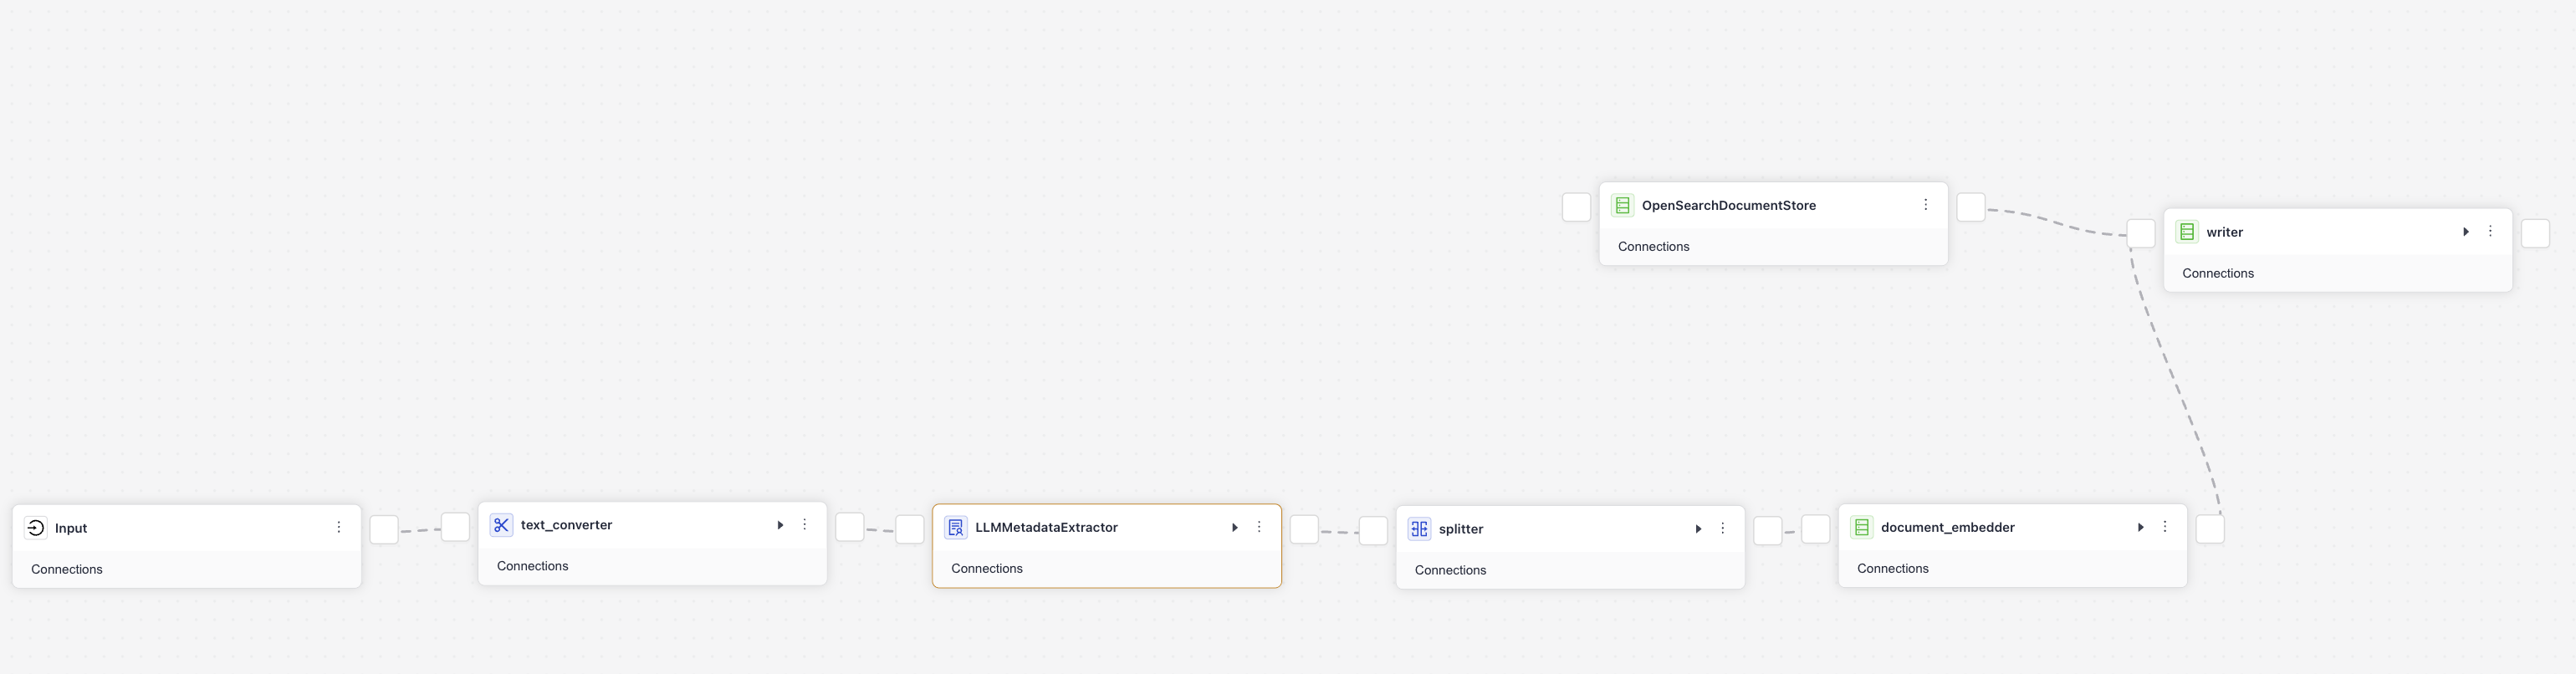
With only one file type to process, you don't need
file_classifier. Delete the component and connecttext_converter'ssourcestoInput.
Result: You have adjusted the index to your needs, getting rid of unnecessary components and configurations. text_converter now receives files directly from FilesInput and, converts them into documents and sends them to the LLM to annotate. The annotated documents are then preprocessed and written into the document store.
This is what your index looks like now:
Index YAML
components:
  text_converter:
    type: haystack.components.converters.txt.TextFileToDocument
    init_parameters:
      encoding: utf-8

      store_full_path: false
  document_embedder:
    type: deepset_cloud_custom_nodes.embedders.nvidia.document_embedder.DeepsetNvidiaDocumentEmbedder
    init_parameters:
      model: intfloat/e5-base-v2
      normalize_embeddings: true
      meta_fields_to_embed:
      - context

  writer:
    type: haystack.components.writers.document_writer.DocumentWriter
    init_parameters:
      document_store:
        type: haystack_integrations.document_stores.opensearch.document_store.OpenSearchDocumentStore
        init_parameters:
          hosts:
          index: ''
          max_chunk_bytes: 104857600
          embedding_dim: 768
          return_embedding: false
          method:
          mappings:
          settings:
          create_index: true
          http_auth:
          use_ssl:
          verify_certs:
          timeout:
          search_fields:
          - content
          - context
      policy: OVERWRITE

  splitter:
    type: haystack.components.preprocessors.document_splitter.DocumentSplitter
    init_parameters:
      split_by: word
      split_length: 250
      split_overlap: 30
      respect_sentence_boundary: true
      language: en

  LLMMetadataExtractor:
    type: haystack.components.extractors.llm_metadata_extractor.LLMMetadataExtractor
    init_parameters:
      prompt: |
        Please extract the following metadata for the provided document:

        - "title": A short title describing the content
        - "summary": A 2 sentence summary of the content

        document:
        {{ document.content | truncate(25000) }}

        Answer exclusively with the JSON object as plain text. Use NO code blocks, NO markdown formatting, NO prefixes like "json" or similar. Begin your response directly with { and end with }.

        Required structure:
        {
          "title": "<extracted title>",
          "summary": "<extracted summary>"
        }
      chat_generator:
        type: haystack_integrations.components.generators.amazon_bedrock.chat.chat_generator.AmazonBedrockChatGenerator
        init_parameters:
          model: "us.anthropic.claude-sonnet-4-20250514-v1:0"
          boto3_config:
            region_name: us-west-2
            read_timeout: 120
            retries:
              total_max_attempts: 3
              mode: standard
          generation_kwargs:
            max_tokens: 650

      expected_keys:
      - summary
      - title

connections:  # Defines how the components are connected
- sender: document_embedder.documents
  receiver: writer.documents
- sender: splitter.documents
  receiver: document_embedder.documents
- sender: LLMMetadataExtractor.documents
  receiver: splitter.documents
- sender: text_converter.documents
  receiver: LLMMetadataExtractor.documents

inputs:  # Define the inputs for your pipeline
  files:                            # This component will receive the files to index as input
  - text_converter.sources

max_runs_per_component: 100

metadata: {}
Update the Prompt
Now, let's update the prompt to tag the emails with specific attributes.
- Find the
LLMMetadataExtractorand click it. This opens the configuration panel where you can update the prompt. - Delete the current prompt and replace it with the following text:
You are an email annotation assistant. For each email, analyze it and return a JSON object with the following fields:

  - "urgency": one of "high", "medium", or "low".
  - "type": one of "meeting request", "status update", "question", "announcement", or "other".
  - "action required": either "yes" or "no".

  Your answer must only be the JSON object, starting with { and ending with }, with no extra text, explanations, or formatting.

  ---
  Guidelines for annotation

  Urgency
  - "high":
    - Mentions a near-term deadline (e.g., today, tomorrow, this week).
    - Explicitly marked urgent or requires immediate attention.
    - Requests blocking input or decisions.
  - "medium":
    - Requests action but not immediate (within a few days).
    - Important updates with some implied timeliness.
  - "low":
    - Informational only, no clear deadline.
    - General announcements or FYI.

  Type
  - "meeting request": Asks to schedule, confirm, or prepare for a meeting.
  - "status update": Provides progress reports, updates on work, results.
  - "question": Primarily asks for information or clarification.
  - "announcement": Broadcasts general info, policy changes, or news.
  - "other": Anything that doesn’t fit the above categories.

  Action required
  - "yes": Recipient is asked to reply, decide, confirm, attend, or do something.
  - "no": Purely informational, no expectation of response or action.

  ---
  Tie-breaking rules
  1. Meeting request > Question > Status update > Announcement > Other
     - Example: If an email both asks a question and proposes a meeting → classify as "meeting request".
  2. If urgency is ambiguous, default to "medium".
  3. If action required is unclear, default to "no".

  ---
  Example Input:
  "Hi team, could you please confirm your availability for tomorrow’s sync?"

  Example Output:
  { "urgency": "high", "type": "meeting request", "action required": "yes" }

Email: {{ document.content }}
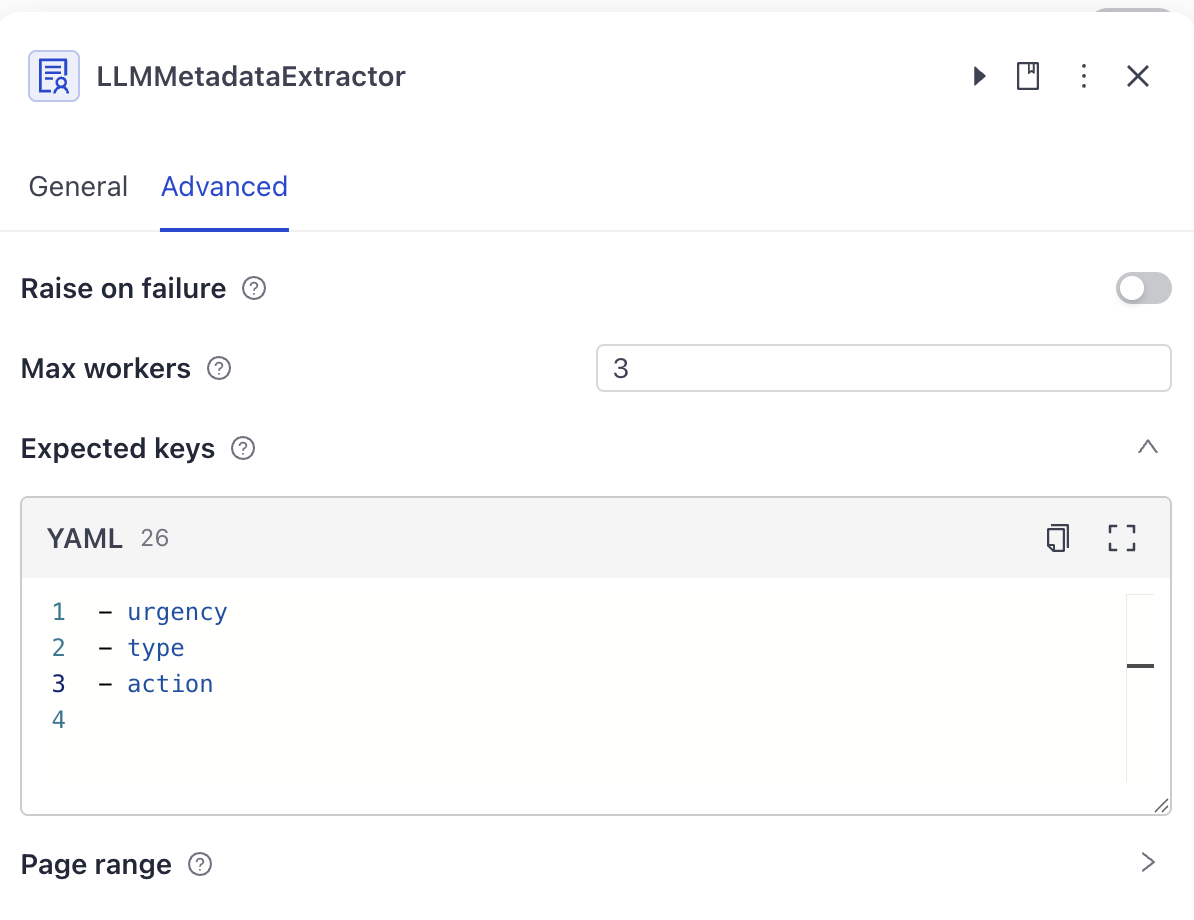
- Optionally, configure the expected metadata keys:
- In the
LLMMetadataExtractorconfiguration panel, click Advanced. - Under
Expected keys, type:
- urgency
- type
- action
Tip: You can also leave expected keys blank. Filling it in submits a warning log if the keys in the expected_keys list don't appear in the LLM response.
- Save your index.
Result: You have updated the prompt to add the following metadata to the documents:
- Urgency: high, medium, low
- Type: meeting request, status update, question, announcement, other
- Action required: yes, no
Your index is ready to process your files.
Index YAML
components:
  text_converter:
    type: haystack.components.converters.txt.TextFileToDocument
    init_parameters:
      encoding: utf-8

      store_full_path: false
  document_embedder:
    type: deepset_cloud_custom_nodes.embedders.nvidia.document_embedder.DeepsetNvidiaDocumentEmbedder
    init_parameters:
      model: intfloat/e5-base-v2
      normalize_embeddings: true
      meta_fields_to_embed:
      - context

  writer:
    type: haystack.components.writers.document_writer.DocumentWriter
    init_parameters:
      document_store:
        type: haystack_integrations.document_stores.opensearch.document_store.OpenSearchDocumentStore
        init_parameters:
          hosts:
          index: ''
          max_chunk_bytes: 104857600
          embedding_dim: 768
          return_embedding: false
          method:
          mappings:
          settings:
          create_index: true
          http_auth:
          use_ssl:
          verify_certs:
          timeout:
          search_fields:
          - content
          - context
      policy: OVERWRITE

  splitter:
    type: haystack.components.preprocessors.document_splitter.DocumentSplitter
    init_parameters:
      split_by: word
      split_length: 250
      split_overlap: 30
      respect_sentence_boundary: true
      language: en

  LLMMetadataExtractor:
    type: haystack.components.extractors.llm_metadata_extractor.LLMMetadataExtractor
    init_parameters:
      prompt: |
        You are an email annotation assistant. For each email, analyze it and return a JSON object with the following fields:

          - "urgency": one of "high", "medium", or "low".
          - "type": one of "meeting request", "status update", "question", "announcement", or "other".
          - "action required": either "yes" or "no".

          Your answer must only be the JSON object, starting with { and ending with }, with no extra text, explanations, or formatting.

          ---
          Guidelines for annotation

          Urgency
          - "high":
            - Mentions a near-term deadline (e.g., today, tomorrow, this week).
            - Explicitly marked urgent or requires immediate attention.
            - Requests blocking input or decisions.
          - "medium":
            - Requests action but not immediate (within a few days).
            - Important updates with some implied timeliness.
          - "low":
            - Informational only, no clear deadline.
            - General announcements or FYI.

          Type
          - "meeting request": Asks to schedule, confirm, or prepare for a meeting.
          - "status update": Provides progress reports, updates on work, results.
          - "question": Primarily asks for information or clarification.
          - "announcement": Broadcasts general info, policy changes, or news.
          - "other": Anything that doesn’t fit the above categories.

          Action required
          - "yes": Recipient is asked to reply, decide, confirm, attend, or do something.
          - "no": Purely informational, no expectation of response or action.

          ---
          Tie-breaking rules
          1. Meeting request > Question > Status update > Announcement > Other
             - Example: If an email both asks a question and proposes a meeting → classify as "meeting request".
          2. If urgency is ambiguous, default to "medium".
          3. If action required is unclear, default to "no".

          Example Input:
          "Hi team, could you please confirm your availability for tomorrow’s sync?"

          Example Output:
          { "urgency": "high", "type": "meeting request", "action required": "yes" }

          Email:
            {{ document.content }}
      chat_generator:
        type: haystack_integrations.components.generators.amazon_bedrock.chat.chat_generator.AmazonBedrockChatGenerator
        init_parameters:
          model: "us.anthropic.claude-sonnet-4-20250514-v1:0"
          boto3_config:
            region_name: us-west-2
            read_timeout: 120
            retries:
              total_max_attempts: 3
              mode: standard
          generation_kwargs:
            max_tokens: 650

      expected_keys:
      - urgency
      - type
      - action
      page_range: ''

connections:  # Defines how the components are connected
- sender: document_embedder.documents
  receiver: writer.documents
- sender: splitter.documents
  receiver: document_embedder.documents
- sender: LLMMetadataExtractor.documents
  receiver: splitter.documents
- sender: text_converter.documents
  receiver: LLMMetadataExtractor.documents

inputs:  # Define the inputs for your pipeline
  files:                            # This component will receive the files to index as input
  - text_converter.sources

max_runs_per_component: 100

metadata: {}
Index Your Files
Let's preprocess the files, add metadata, and write the resulting documents into the document store:
- In Builder, click Enable to start indexing.

The index status changes to Indexing. Hover your mouse over the Indexing label to check progress:
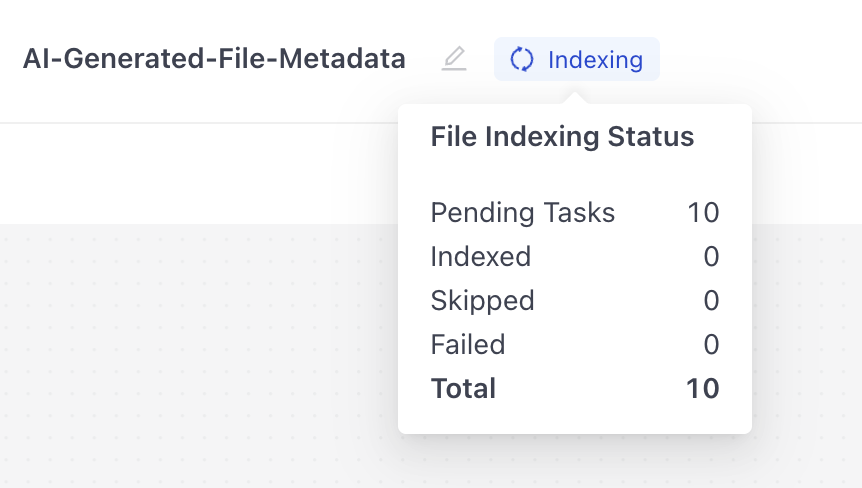
- Wait until the status changes to Indexed.
Verify Metadata
For most file types, you can preview the documents that were created from a file, together with their metadata, in Haystack Enterprise Platform. To do this, just click the file. You'll see the preview and the metadata.The emails you uploaded are of a type whose previews are not supported in Haystack Platform.
Use this Colab notebook to analyze the metadata stored in the document store: Haystack Enterprise Platform Document Metadata Checker.
Result: Congratulations! You have created an index that can add metadata to documents and store them in a document store. You've adjusted the index to get rid of unnecessary components and changed the prompt to instruct the LLM to label the documents in a specific way.
What's Next
You can now use the labelled documents in your query pipeline. For example, you can use MetadataRouter or ConditionalRouter to route the documents based on their metadata values to specific pipeline branches.
Was this page helpful?