Tutorial: Uploading Files with Metadata through SDK CLI
Learn to quickly upload large amounts of files with metadata. In this tutorial, you'll upload a set of hotel reviews but you can replace these files with your own. You will use the SDK package with a command-line.
- Level: Beginner
- Time to complete: 10 minutes
- Prerequisites:
- You must be an Admin to complete this tutorial.
- The workspace where you want to upload the files must already be created in Haystack Enterprise Platform. In this tutorial, we call the workspace hotel_reviews.
- Goal: After completing this tutorial, you will have uploaded a set of hotel reviews with metadata to a Haystack Platform workspace. You can replace this dataset with your custom one.
Prepare Your Files
This tutorial uses a set of hotel reviews with some metadata in them. You can also use your own files. Make sure their extensions are lowercase, for example: myfile.txt instead of myfile.TXT.
- Download the hotel reviews dataset.
- Extract the files to a folder called hotel_reviews in your Documents folder. This can take a couple of minutes.
Result: You have 5,956 files in the \Documents\hotel_reviews folder, 2978 TXT files and 2978 JSON files. Each TXT file is accompanied by a .meta.json file containing the text file metadata.
Install the SDK
- Open the command line and run:
pip install deepset-cloud-sdk - Wait until the installation finishes with a success message.
Result: You have installed the Haystack Platform SDK. It comes with a command line interface that we'll use to upload the files.
Obtain the API Key
- Log in to Haystack Enterprise Platform.
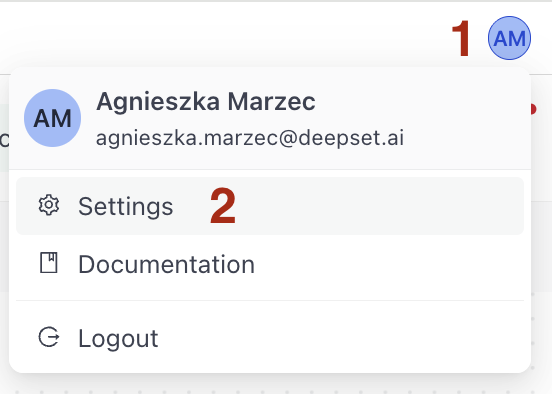
- Click your profile icon in the top right corner and choose Settings.
- Go to Workspace>API Keys.
- Under API Keys, click Create API key.
- Configure the key:
- Choose Personal Key.
- Type "tutorial" as the key name.
- Set the expiration date to the end of the month.
- Choose the workspace where you want to upload the files.
- Choose the role to determine the key's permissions. It should be at least Editor.
- Click Create API key.
- Copy the key and save it to a notepad.
Result: You have an API key saved in a file. You can now use it to upload your files.
Upload Files
- Open the command line and run the following command to log in to Haystack Enterprise Platform:
deepset-cloud loginpython -m deepset_cloud_sdk.cli login - When prompted, paste your API key.
- Type the name of the Haystack Platform workspace where you want to upload the files. This creates an .env file with the information you just provided. The SDK uses the information from this file when uploading files.
- Run this command to upload files, including all the subfolders of the hotel_reviews folder and overwrite any files with the same name that might already exist in the workspace:
deepset-cloud upload <path_to_hotel_reviews_folder> --recursive --write-mode OVERWRITE
python -m deepset_cloud_sdk.cli upload <path_to_hotel_reviews_folder> --recursive --write-mode OVERWRITE
To upload other file types, use --desired_file_types with a list of file types, for example: --desired_file_types ['.csv', '.html']\.
- Wait until the upload finishes successfully. You should see this message:

5956 files are uploaded, and half of them, 2978 are listed in Haystack Enterprise Platform. (The metadata files are not shown in Haystack Platform).
Result: You have uploaded all your files, including the ones from the subfolders. Let's now see if they're showing up in Haystack Platform.
Verify the Upload
-
In the command line, list the uploaded files by running:
deepset-cloud list-filespython -m deepset_cloud_sdk.cli list-filesYou should see a list of files with file ID, URL, name, size, metadata, and the date when it was created.

With the number of files we uploaded, it's easier to verify if they uploaded correctly in the Haystack Platform UI.
-
You can also check it in Haystack Platform. Click the workspace name to switch to the workspace where you uploaded the files, and choose Files in the navigation. You should see all the uploaded files on the Files page.
-
Now, let's check if the metadata was uploaded. One way to do this is to open a random file and then click View Metadata on the file preview.
Was this page helpful?