Tutorial: Building a Summarization System with a Large Language Model
This tutorial teaches you how to build a question answering system that generates answers based on your documents. It uses an LLM through the Generator component.
- Level: Beginner
- Time to complete: 15 minutes
- Prerequisites:
- This tutorial assumes a basic knowledge of large language models and retrieval-augmented generation (RAG). If you need more information, check Language Models and Retrieval Augmented Generation (RAG) Question Answering.
- You must be an Admin to complete this tutorial.
- This tutorial uses the gpt-3.5-turbo model, so you need an API key from an active OpenAI account.
If you don't have an account with OpenAI, you can replace this model with an open source one, like Llama2, but bear in mind its performance may not be sufficient.
- Goal: After completing this tutorial, you will have created a system that can generate summaries of reports on child obesity and food advertising regulations. You will have learned how to use PromptBuilder and a Generator with a large language model and a custom prompt.
- Keywords: PromptBuilder, Generator, summarization, large language models, prompts
Connect Your OpenAI Account
Perform this step if you want to use the gpt-3.5-turbo model by OpenAI. You can skip this step if you plan to use an open source model.
Once you connect deepset Cloud to your OpenAI account, you'll be able to use OpenAI models without passing the API keys in the pipeline itself.
- In deepset Cloud, click your initials in the top right corner and choose Connections.
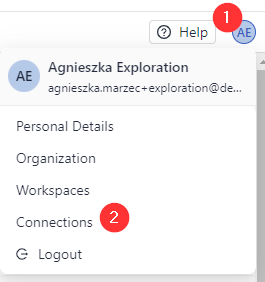
- Next to OpenAI, click Connect, paste your OpenAI API key, and click Submit.
Result: You're connected to your OpenAI account and can use OpenAI models in your pipelines.

Upload Files
First, let's upload the files we want our search system to run on. The files here are a set of reports on the impact of food marketing on child obesity. You can replace this dataset with any other dataset.
-
Download the .zip file with sample files and unpack it on your computer.
-
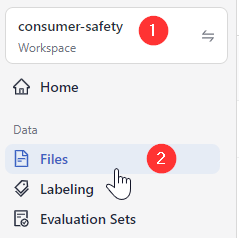
Go to deepset Cloud, make sure you're in the workspace you want to use for this task, and go to _Files.
-
Click Upload Files.
-
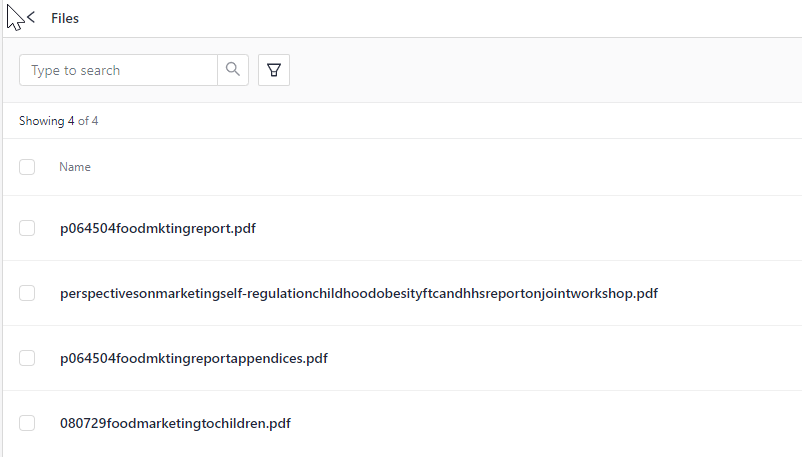
Select all the files you extracted, drop them into the Upload Files window, and click Upload. There should be four files in total.
Result: Your files are in your workspace, and you can see them on the Files page.
Create the Pipeline
We'll use an out-of-the-box template as a baseline for our pipeline, and we'll adjust it a bit:
-
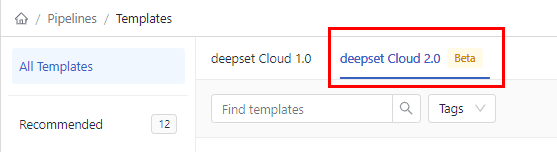
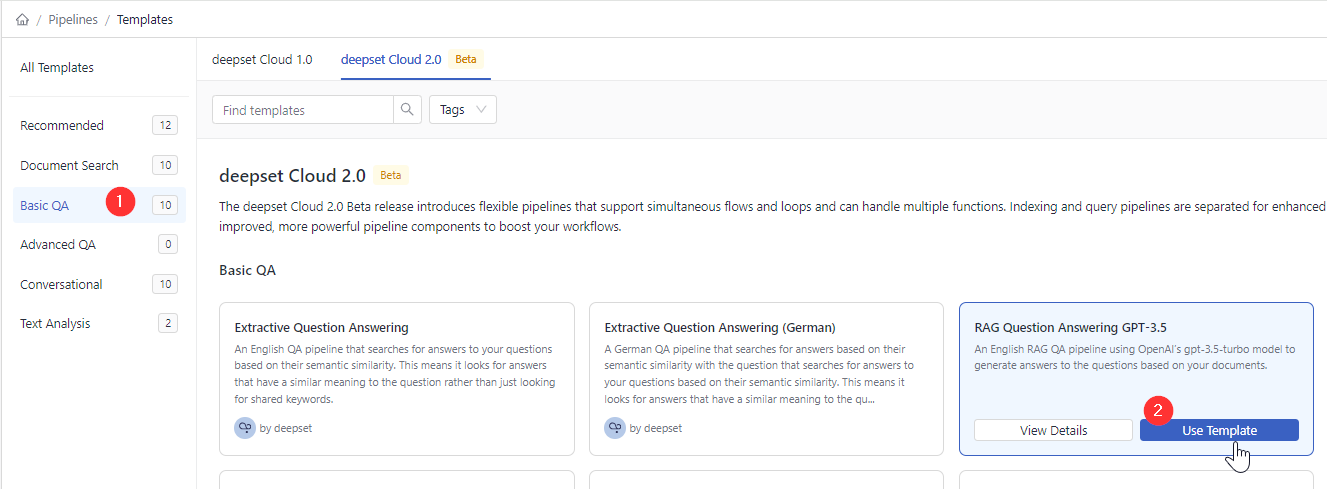
In deepset Cloud, go to Pipeline Templates and make sure you're on the deepset Cloud 2.0 tab.
-
Click Basic QA, find RAG Question Answering GPT-3.5, and choose Use Template.
-
Type summarization as the pipeline name and click Create Pipeline. You're redirected to the Pipelines page. You can find your pipeline in the All tab.
-
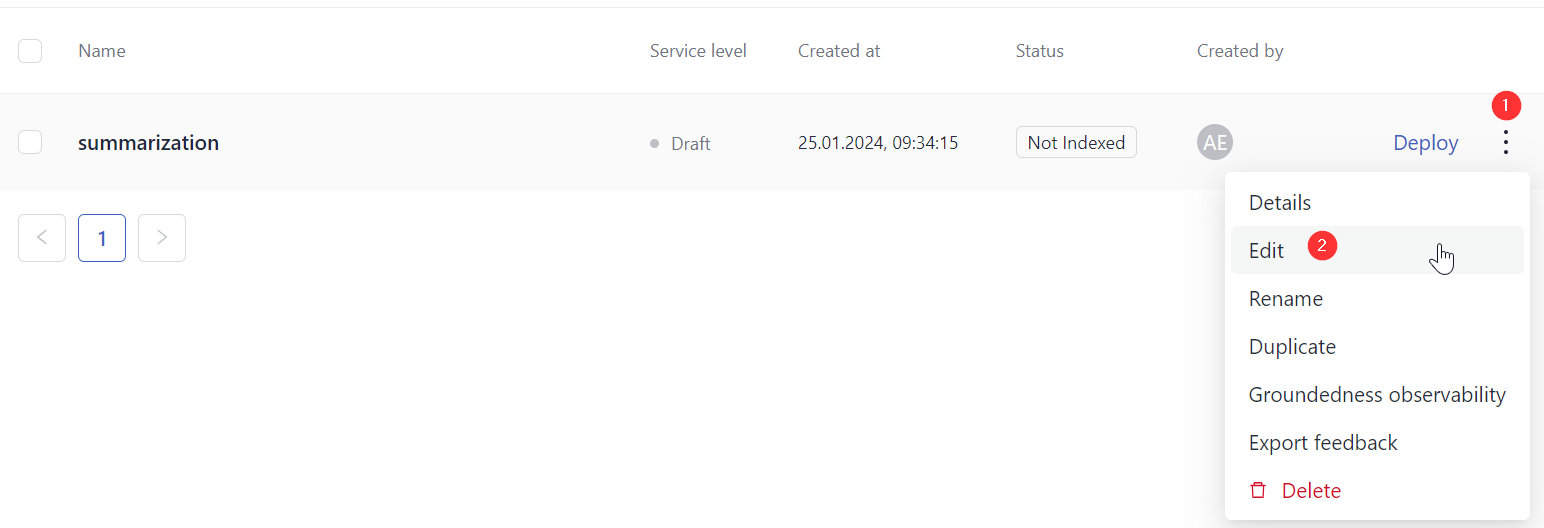
Click the More Actions button next to your pipeline and choose Edit.
-
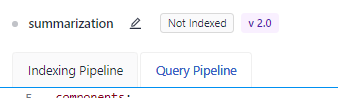
In Code Editor, switch to the Query Pipeline tab.
-
Copy this pipeline configuration and paste it into the Editor:
components:
  - name: DocumentStore
    type: DeepsetCloudDocumentStore
    params:
      embedding_dim: 768
      similarity: cosine
  - name: BM25Retriever # The keyword-based retriever
    type: BM25Retriever
    params:
      document_store: DocumentStore
      top_k: 10 # The number of results to return
  - name: EmbeddingRetriever # Selects the most relevant documents from the document store
    type: EmbeddingRetriever # Uses a Transformer model to encode the document and the query
    params:
      document_store: DocumentStore
      embedding_model: intfloat/e5-base-v2 # Model optimized for semantic search. It has been trained on 215M (question, answer) pairs from diverse sources.
      model_format: sentence_transformers
      top_k: 10 # The number of results to return
  - name: JoinResults # Joins the results from both retrievers
    type: JoinDocuments
    params:
      join_mode: concatenate # Combines documents from multiple retrievers
  - name: Reranker # Uses a cross-encoder model to rerank the documents returned by the two retrievers
    type: SentenceTransformersRanker
    params:
      model_name_or_path: intfloat/simlm-msmarco-reranker # Fast model optimized for reranking
      top_k: 1 # The number of results to return
      batch_size: 20  # Try to keep this number equal or larger to the sum of the top_k of the two retrievers so all docs are processed at once
      model_kwargs:  # Additional keyword arguments for the model
        torch_dtype: torch.float16
  - name: summarization
    type: PromptTemplate
    params:
      output_parser:
        type: AnswerParser
      prompt: deepset/summarization
  - name: PromptNode
    type: PromptNode
    params:
      default_prompt_template: summarization
      max_length: 400 # The maximum number of tokens the generated answer can have
      model_kwargs: # Specifies additional model settings
        temperature: 0 # Lower temperature works best for fact-based qa
      model_name_or_path: gpt-3.5-turbo
      top_k: 1
  - name: ReferencePredictor # Finds and displays references to the generated answers from the retrieved documents
    type: ReferencePredictor
    params:
      model_name_or_path: cross-encoder/ms-marco-MiniLM-L-6-v2
      verifiability_model_name_or_path: tstadel/answer-classification-setfit-v2-binary
      language: en
      use_split_rules: True # Uses additional rules for better splitting
      extend_abbreviations: True # Extends abbreviations handled with a curated list
  - name: FileTypeClassifier # Routes files based on their extension to appropriate converters, by default txt, pdf, md, docx, html
    type: FileTypeClassifier
  - name: TextConverter # Converts files into documents
    type: TextConverter
  - name: PDFConverter # Converts PDFs into documents
    type: PDFToTextConverter
  - name: Preprocessor # Splits documents into smaller ones and cleans them up
    type: PreProcessor
    params:
      # With a vector-based retriever, it's good to split your documents into smaller ones
      split_by: word # The unit by which you want to split the documents
      split_length: 250 # The max number of words in a document
      split_overlap: 20 # Enables the sliding window approach
      language: en
      split_respect_sentence_boundary: True # Retains complete sentences in split documents

# Here you define how the nodes are organized in the pipelines
# For each node, specify its input
pipelines:
  - name: query
    nodes:
      - name: BM25Retriever
        inputs: [Query]
      - name: EmbeddingRetriever
        inputs: [Query]
      - name: JoinResults
        inputs: [BM25Retriever, EmbeddingRetriever]
      - name: Reranker
        inputs: [JoinResults]
      - name: PromptNode
        inputs: [Reranker]
      - name: ReferencePredictor
        inputs: [PromptNode]
  - name: indexing
    nodes:
    # Depending on the file type, we use a Text or PDF converter
      - name: FileTypeClassifier
        inputs: [File]
      - name: TextConverter
        inputs: [FileTypeClassifier.output_1] # Ensures that this converter receives txt files
      - name: PDFConverter
        inputs: [FileTypeClassifier.output_2] # Ensures that this converter receives PDFs
      - name: Preprocessor
        inputs: [TextConverter, PDFConverter]
      - name: EmbeddingRetriever
        inputs: [Preprocessor]
      - name: DocumentStore
inputs: [EmbeddingRetriever]-
Here's an explanation of the changes:
- In line 49, we changed the
top_kvalue of theTransformersSimilarityRankercomponent to1to make sure the Ranker returns one best document for the summary. - In line 57, we deleted prompt text and replaced it with a link to a ready-made summarization template (
deepset/summarization). - Lines 59 to 67 is the OpenAIGenerator component. To use another model by OpenAI, pass the model name in the OpenAIGenerator's
modelparameter.
To use a model by another provider, change the Generator component to one specific to the provider. - Line 54 is where you can change the LLM PromptNode uses.
- In line 49, we changed the
-
Save your pipeline.
-
At the top of the Designer, click Deploy and wait until your pipeline is deployed and indexed. Indexing may take a couple of minutes.
Result: You created a pipeline summarizing documents using a large language model. The pipeline status is indexed, which means it's ready for use. Your pipeline is at the development service level. We recommend you test it before setting it to the production service level.
Test the Pipeline
Now it's time to see how your pipeline is doing. Let's run a search with it.
-
In the navigation, click Playground.
-
Make sure the summarization pipeline is selected.
-
Type the query: summarize the report on advertising food to children.
Here's what the pipeline returns:
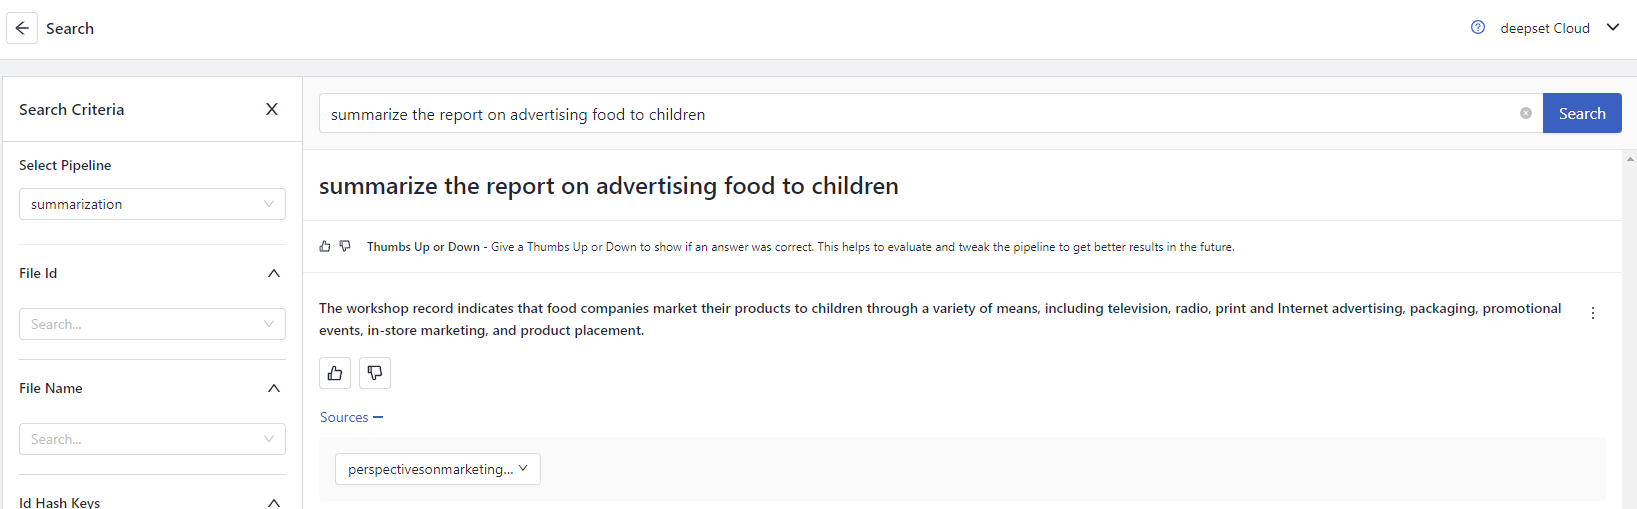
Result: Congratulations! You just created a summarization pipeline that uses a large language model to generate summaries of documents.
What's Next
Your pipeline is now a development pipeline. Once it's ready for production, change its service level to Production. You can do this on the Pipeline Details page shown after clicking a pipeline name. To learn more, see Pipeline Service Levels.
Updated about 1 month ago