Custom Components
You can create your own components and add them to your deepset pipelines.
Why Custom Components?
While we offer various pre-built components to handle various tasks, you might need something more tailored to your needs. This is when custom components come in. With custom components, you can:
- Adjust the functionality to your specific needs and use cases.
- Integrate proprietary algorithms or business logic.
- Extend the pipeline's capabilities.
deepset AI Platform uses deepset's open source Haystack framework as the underlying technology. Custom components are based on Haystack's components. To learn more about Haystack, visit the Haystack website. To learn about custom components in Haystack, see Creating Custom Components.
Adding Custom Components
Custom Components Template
We provide a template for creating your custom components, which are available as a GitHub repository. This template serves as a custom components library for your organization. Components created in the ./dc-custom-component-template/src/dc_custom_component/example_components/ folder and imported into deepset AI Platform are the components you can use in your pipelines. Only the components present in the most recently uploaded template are available for use.
For example, if someone in your organization creates a component called WelcomeTextGenerator and uploads it to deepset, everyone in the organization can use it. However, if later someone adds two new components, GoodbyeTextGenerator and CharacterSplitter, and deletes WelcomeTextGenerator, only the new components will be available to use in your pipelines. WelcomeTextGenerator will no longer be accessible.
Workflow
Here's the whole workflow, step-by-step:
- Fork the GitHub template we provide.
- Use the template to create your custom components.
- When your components are ready, import them to deepset AI Platform. You can do this by creating a release of your repository or zipping the template package and uploading it to deepset using the API or the commands.
The package is validated on upload to check if its structure complies with the template. - Check the upload status:
- If you uploaded through a repository release, check the Actions tab. If all the checks have passed, your component is uploaded.
- If you uploaded using API or commands, use the Get Custom Component endpoint. If the component is uploaded successfully, you can use it in your pipelines.
- Or simply edit a pipeline where you want to use your custom component and check if your component is already in the component library.
- Use the component in your pipelines just like any other component.
Components support dependencies and have access to the internet.
Currently, you can't delete custom components. To update custom components, upload a new version.
Template Structure
We offer a template for creating custom components you can access at GitHub. There are two files in the repo that you'll need to modify:
./dc-custom-component-template/src/dc_custom_component/example_components/<custom_component_folder>/<custom_component>.py: This is where your component code is stored. The base path./dc-custom-component-template/src/dc_custom_component/must remain unchanged, but you can create additional subfolders to organize your custom components within thedc_custom_componentfolder.
You can create a separate folder for each component, with its own.pyfile, or group multiple components in a single folder and manage them through one.pyfile. Whatever works best for you.
The folder name appears as the group's name in the components library in Pipeline Builder, where you can find your custom component. For example, if you place your custom component under./dc-custom-component-template/src/dc_custom_component/components/rankers/custom_ranker.py, it will show up in Pipeline Builder in the Rankers group../dc-custom-component-template/src/dc_custom_component/__about__.py: This is the component version. Make sure to update it here every time you upload a new version. The version is set for all components in the package../dc-custom-component-template/pyproject.toml: If your component has any dependencies, you can add them in this file in thedependenciessection.
Versioning
Here's how pipelines use your custom component versions:
- New pipelines can only use the latest version of your components.
- Running pipelines use the component version that was the latest at the time when then were deployed. To use a new version of a custom component, undeploy the pipelines using the component and deploy them again.
To compare different versions of a component, upload a package with both versions included in the .py file, similar to how you would upload two components at once. Ensure each version has a unique name. After that, create multiple pipelines, each using a different component version, and compare their performance.
Handling Non-JSON Serializable Types
If your component uses an input type that's not JSON-serializable, you must implement its serialization methods: to_dict() and from_dict(). These methods define how to convert the type into a dictionary, which is needed for storage or transmission.
One example is the Secret type. This type enhances security by preventing you from directly passing sensitive information, like API keys, into initialization parameters. Since it's not a JSON-serializable type, you must implement the to_dict() and from_dict() methods to convert it into a JSON-serializable string for proper handling.
For an example of a component that uses the Secret type, see the Examples section below.
Using Components In a Pipeline
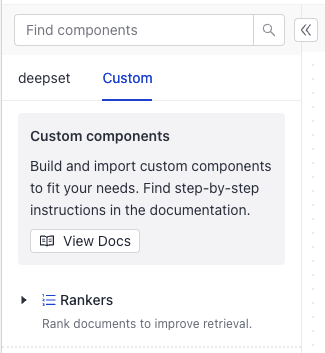
Once your component is in deepset AI Platform, you can add it to your pipelines using Pipeline Builder. Create or edit your pipeline as you normally would by dragging it from the Custom tab in the Component Library.
Component's Structure
Each component is a Python class with the following required elements:
- The
from haystack import componentimport statement. - The
@componentdecorator to indicate you're creating a component. - The
run()method that defines what the component does.- The
run()method must have the@component.output_typesdecorator to define the type of data the component outputs and the name of the outputting edge. The names and types you define as output types must match the keys and value types of the dictionary object therun()method returns. For details, see Examples below. - You can specify the input parameters for the
run()method. - The
run()method must return a dictionary with the keys and values you specify.
- The
Optionally, you can:
-
Add the initialization parameters your component requires in the
__init__()method. For example, this custom component is initialized with thepydantic_modelparameter:import json import random import pydantic from pydantic import ValidationError from typing import Optional, List from colorama import Fore from haystack import component # Define the component input parameters @component class OutputValidator: """ Validates if a JSON object complies with the provided Pydantic model. If it doesn't, this component returns an error message along with the incorrect object. """ def __init__(self, pydantic_model: pydantic.BaseModel): """ Initialize the OutputValidator component. :param pydantic_model: The Pydantic model the JSON object should comply with. """ self.pydantic_model = pydantic_model self.iteration_counter = 0 # Define the component output @component.output_types(valid_replies=List[str], invalid_replies=Optional[List[str]], error_message=Optional[str]) def run(self, replies: List[str]): """ Validate a JSON object. :param replies: The LLM output that should be validated. """ self.iteration_counter += 1 ## Try to parse the LLM's reply ## # If the LLM's reply is a valid object, return `"valid_replies"` try: output_dict = json.loads(replies[0]) self.pydantic_model.parse_obj(output_dict) print( Fore.GREEN + f"OutputValidator at Iteration {self.iteration_counter}: Valid JSON from LLM - No need for looping: {replies[0]}" ) return {"valid_replies": replies} # If the LLM's reply is corrupted or not valid, return "invalid_replies" and the "error_message" for LLM to try again except (ValueError, ValidationError) as e: print( Fore.RED + f"OutputValidator at Iteration {self.iteration_counter}: Invalid JSON from LLM - Let's try again.\n" f"Output from LLM:\n {replies[0]} \n" f"Error from OutputValidator: {e}" ) return {"invalid_replies": replies, "error_message": str(e)} -
Add docstrings. This is not required, but we recommend adding docstrings to explain the purpose and functionality of your component. These docstrings appear as component tooltips in Pipeline Builder and also serve as component documentation. To add a docstring, place it under the component name within triple quotes (
"""). You can use Markdown formatting:@component class ComponentName: # Add docstrings here like that: """ Description of the component. You can use Markdown formatting. """ # If your component takes parameters, add their explanations like this: def method_name(self, param1_name: Optional[type] = default_value, param2_name: Required[type] = default_value2): """ Description of what the method does :param param1_name: Description of the parameter. You can use Markdown formatting. :param param2_name: Description of the parameter. You can use Markdown formatting. """ -
Add other methods your component needs.
Examples
Components With No Parameters
This is an example of a very basic component called WelcomeTextGenerator with just the run() method. The component takes name as an input parameter and returns a welcome text with the name, converted to upper case, and a note.
@component # decorator
class WelcomeTextGenerator: # component name

    """
    A component generating personal welcome message and making it upper case.

    Example from [Haystack documentation](https://docs.haystack.deepset.ai/docs/custom-components#extended-example).
    """

    @component.output_types(welcome_text=str, note=str) # types of data the component outputs
    def run(self, name: str) -> Dict[str, str]: # parameters for the run() method, the types match the output_types (two strings)
        """
        Generate a welcome message and make it upper case.

        :param name: The name of the user to include in the message.
        """
        return {
            "welcome_text": (
                "Hello {name}, welcome to Haystack!".format(name=name)
            ).upper(),
            "note": "welcome message is ready",
        }
   # For `name: Jane` the component will return:
# {'welcome_text': "HELLO JANE, WELCOME TO HAYSTACK!", 'note':"welcome message is ready"}
Components With Initialization Parameters
Here's an example of a component with initialization parameters. The component is called OutputValidator and is designed to validate if the JSON object an LLM generated complies with the provided Pydantic model. It's initialized with a pydantic_model. At runtime, it expects replies, which is the LLM's output to verify. It then returns the valid objects and invalid objects. If there are invalid objects, it also returns an error message:
import json
import pydantic
from pydantic import ValidationError
from typing import Optional, List
from colorama import Fore
from haystack import component

# Define the component input parameters
@component
class OutputValidator:
  """
  Validates if a JSON object complies with the provided Pydantic model. If it doesn't, this component
  returns an error message along with the incorrect object.
  """
    def __init__(self, pydantic_model: pydantic.BaseModel):
      """
      Initialize the OutputValidator component.

      :param pydantic_model: The Pydantic model the JSON object should comply with.
      """
        self.pydantic_model = pydantic_model
        self.iteration_counter = 0

    # Define the component output
    @component.output_types(valid_replies=List[str], invalid_replies=Optional[List[str]], error_message=Optional[str])
    def run(self, replies: List[str]):
      """
      Validate a JSON object.

      :param replies: The LLM output that should be validated.
      """

        self.iteration_counter += 1

        ## Try to parse the LLM's reply ##
        # If the LLM's reply is a valid object, return `"valid_replies"`
        try:
          output_dict = json.loads(replies[0])
          self.pydantic_model.parse_obj(output_dict)
          print(
            Fore.GREEN
            + f"OutputValidator at Iteration {self.iteration_counter}: Valid JSON from LLM - No need for looping: {replies[0]}"
          )
          return {"valid_replies": replies}

        # If the LLM's reply is corrupted or not valid, return "invalid_replies" and the "error_message" for LLM to try again
        except (ValueError, ValidationError) as e:
          print(
            Fore.RED
            + f"OutputValidator at Iteration {self.iteration_counter}: Invalid JSON from LLM - Let's try again.\n"
            f"Output from LLM:\n {replies[0]} \n"
            f"Error from OutputValidator: {e}"
          )
          return {"invalid_replies": replies, "error_message": str(e)}
For more information and examples, see Haystack resources:
- Examples of custom components in Haystack: Custom Components.
- Generating Structured Output with Loop-Based Auto-Correction: An example that uses a custom component to validate JSON objects generated by an LLM.
Components Connecting to a Third-Party Provider
You can add components to integrate tools and services into deepset AI Platform. An example are the VoyageTextEmbedder and VoyageDocumentEmbedder, which are components developed by a Haystack community member to connect to Voyage AI. Using custom components, you can connect to any provider.
Components that connect to third-party providers need an API key of the provider to connect to it. An example may be a generator connecting to a model provider. The easiest way to handle this is by storing the API key in an environment variable and then retrieving it in the component's run() method.
The following component shows how to do this. First, you add the env_var_name init parameter and then you retrieve this value in the run() method using os.getenv(self.env_var_name). The retrieved value is stored in loaded_api_key.
@component
class CustomComponent:
    def __init__(self, env_var_name: str = "API_KEY"):
        self.env_var_name = env_var_name

    @component.output_types(answers=List[GeneratedAnswer])
    def run(self, query: str) -> Dict[str, List[GeneratedAnswer]]:
        loaded_api_key = os.getenv(self.env_var_name)
        # use the key
        pass
You can also use the Secrets feature to manage your API keys in custom components. This requires adding serialization and deserialization method to your component's code. For examples and explanation, see Add Secrets to Connect to Third Party Providers.
Components With Non-JSON Serializable Input Types
Let's look at an example of a component using the Secret type. It has the necessary import statement, then the warm_up() method to load the API key before pipeline validation, and finally the serialization to_dict() and deserialization from_dict() methods:
from haystack import component, default_from_dict, default_to_dict
from haystack.utils import Secret, deserialize_secrets_inplace
from typing import Any, Dict


@component
class MyComponent:
    def __init__(self, model_name: str, api_key: Secret = Secret.from_env_var("ENV_VAR_NAME")):
        self.model_name = model_name
        self.api_key = api_key
        self.backend = None

    def warm_up(self):
        # Call api_key.resolve_value() to load the API key from the environment variable
        # We put the resolution in warm_up() to avoid loading the API key during pipeline validation
        if self.backend is None:
            self.backend = SomeBackend(self.model_name, self.api_key.resolve_value())

    def to_dict(self) -> Dict[str, Any]:
        # Make sure to include any other init parameters in the to_dict method
        return default_to_dict(
            self,
            model_name=self.model_name,
            api_key=self.api_key.to_dict(),
        )

    @classmethod
    def from_dict(cls, data: Dict[str, Any]) -> "MyComponent":
        # Make sure to use deserialize_secrets_inplace to load the Secret object
        init_params = data.get("init_parameters", {})
        deserialize_secrets_inplace(init_params, keys=["api_key"])
        return default_from_dict(cls, data)

    def run(self, my_input: Any):
        if self.backend is None:
            raise RuntimeError("The component wasn't warmed up. Run 'warm_up()' before calling 'run()'.")
        return self.backend.process(my_input)
For more information about how secrets work in Haystack, see Secret Management.
For details on secrets in deepset, see Add Secrets.
Components Using Haystack Experimental Features
You can use custom components to add components from the haystack-experimental package to your pipelines and try them out. Bear in mind that the experimental components are not suitable for production pipelines as they're likely to change or get deprecated. For more information about haystack-experimental, see Haystack documentation and deepset AI Platform and Haystack.
To add an experimental component, import it and then inherit from it in you custom component code. This example adds LLMMetadataExtractor from the haystack-experimental package:
from haystack import component
from haystack_experimental.components.extractors.llm_metadata_extractor import (
    LLMMetadataExtractor,
)


@component
class ExperimentalLLMMetadataExtractor(LLMMetadataExtractor):
    """Haystack Experimental LLM Metadata Extractor"""
Save the component code, upload it to deepset, and use it like you would any other custom component.
Components In a Pipeline
This is an example of an indexing pipeline that uses a custom component called CharacterSplitter. This component splits text into smaller chunks by the number of characters you specify. It takes the split_length parameter, accepts a list of documents as input, and returns as list of split documents.
components:
...
   custom_component: # this is a custom name for your component, it's up to you
    init_parameters: #here you can set init parameters for your component, if you added any. Otherwise delete init_parameters.
       split_length: 50
    type: dc_custom_component.components.splitters.character_splitter.CharacterSplitter
      # this is the path to your custom component; it reflects the template structure starting from the "src" directory and separated with periods.
      # If you changed the path, the type must reflect this.
      # This component's path was "./dc-component-template/src/dc_custom_component/components/splitters/character_splitter.py"

   pptx_converter:
    type: haystack.components.converters.pptx.PPTXToDocument
    init_parameters: {}

   document_embedder:
    type: haystack.components.embedders.sentence_transformers_document_embedder.SentenceTransformersDocumentEmbedder
    init_parameters:
      model: "intfloat/e5-base-v2"
      ...


    connections:
    - receiver: custom_component.documents  # Define how to connect to your component to other components, make sure the input and output types match.
      sender: pptx_converter.documents
    - receiver: document.embedder.documents
      sender: custom_component.documents

    inputs:  # Define the inputs for your pipeline
      files:  # These components will receive files as input
      - ...


    max_loops_allowed: 100
    metadata: {}
Updated 29 days ago